Dynamic User Filters in Dashboards
Zoho Analytics allows you to include dynamic filtering capability in the dashboards in the View Mode. You can add User Filters for the entire dashboard, or for a specific report. You can also use a report as a filter for the dashboard. This enables the consumers of the dashboard to dynamically filter and view the required information.
This section explains the various filtering options available for Dashboards in Zoho Analytics.
- User Filters
- Global User Filter
- Adding Timeline Filters
- Merging User Filters
- Mapping Different Columns for Individual Report
- Reports as Filter
- Combined User Filter as Preset
- Exclude Report from Dashboard Filters
- Invalid Filters
User Filters
User Filters are filters added in the view mode of the dashboard. You can add the user filters of the added reports, or create new filters in the dashboard. User Filters can be displayed using a variety of components like drop-down box, slider, date range chooser etc.
- Create New User Filter
- Auto-Add User Filter from Reports
- Add User Filter to Dashboard
Create New User Filter
Following sections describe in detail the User Filters for various column types (Data types).
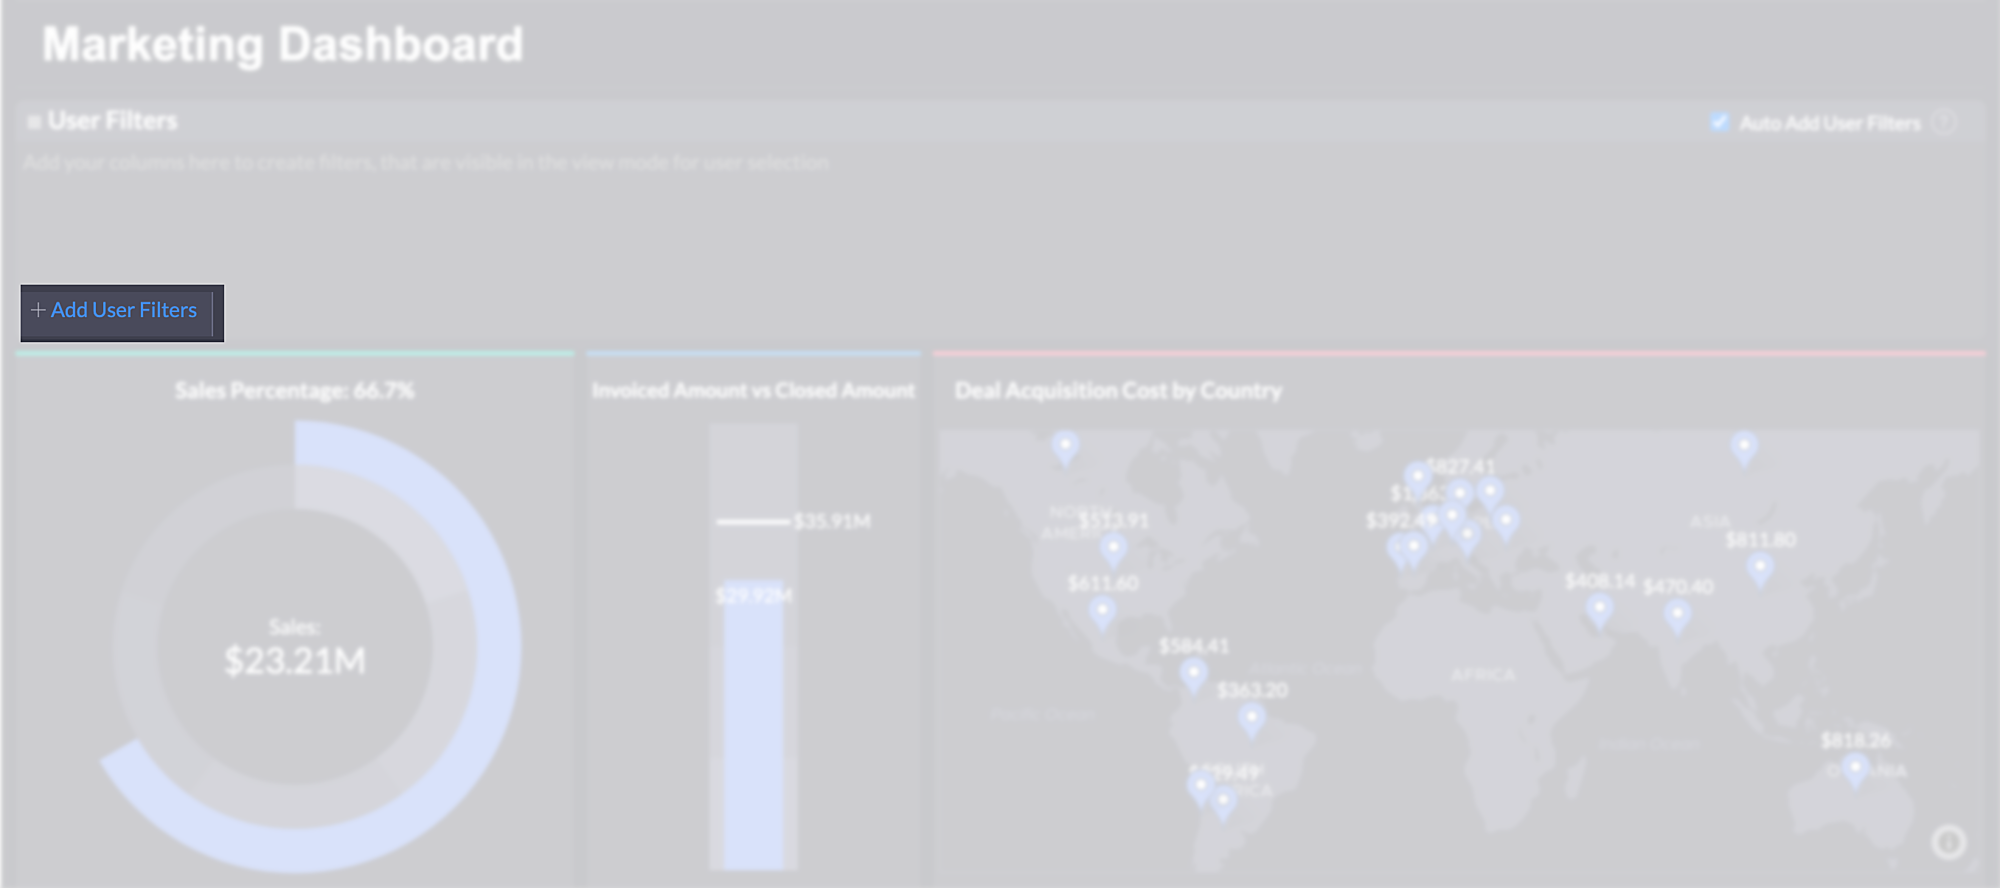
To add User Filters to the Dashboard:
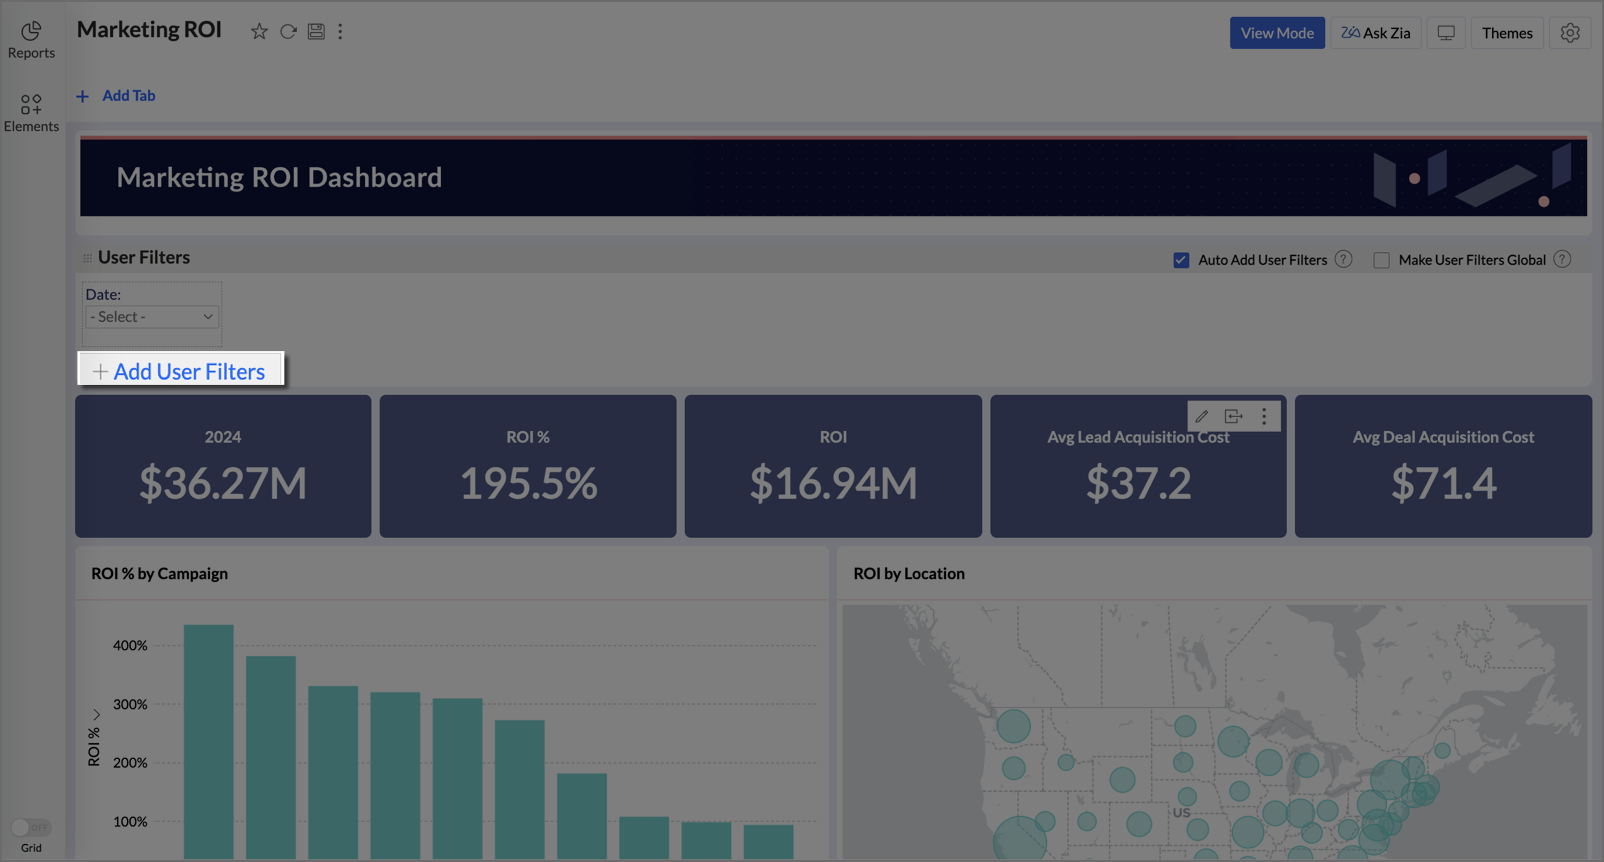
In the Edit Mode, User Filters section will be available. Click the Add User Filters button.
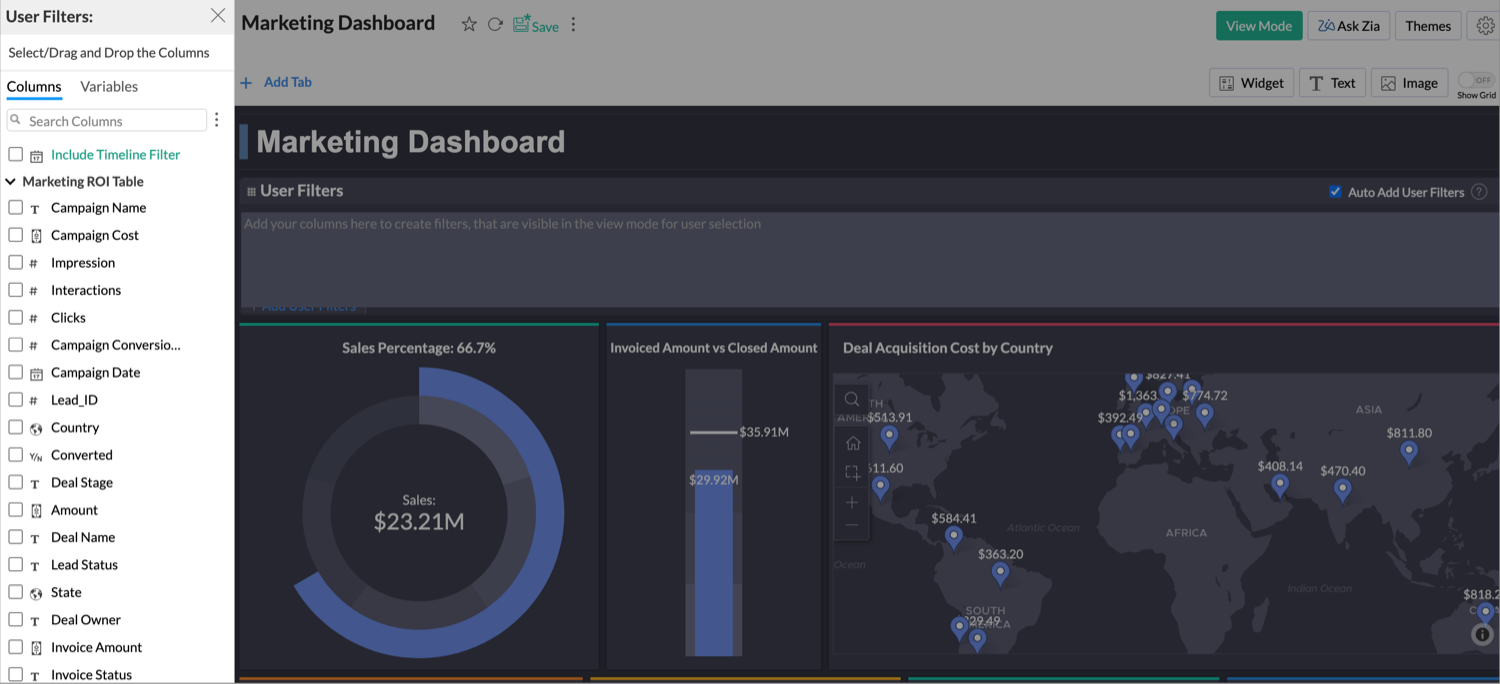
- All columns relevant to the reports added in the dashboard will be listed in the column panel at the left. Drag and drop the required columns to be used as user filters.

The following section explains how to create User Filters of each data type.
User Filters for Text (Categorical) Column Type
User Filters for Numeric and Currency Column Type
User Filters for Date Column Type
Auto Add User Filters from Reports
Zoho Analytics allows you to add user filters available in the embedded reports into the dashboard. This is an easy & convenient way to add users filters to a dashboard, without repeating the tedious task of creating them again.
Add User Filters to Dashboard
To auto add the user filters from reports to the dashboard, select the Auto Add User Filters checkbox from the User Filters field.
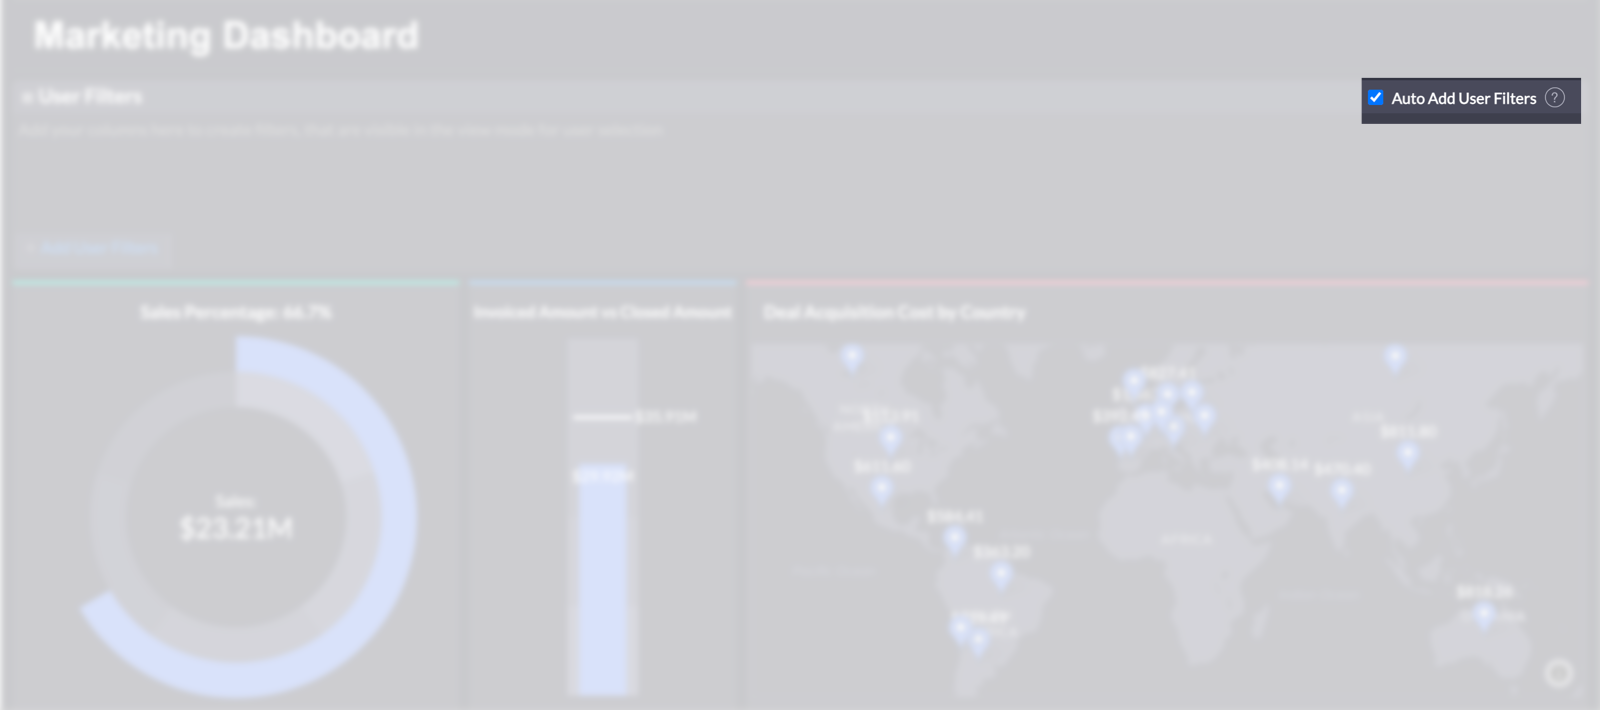
As you add reports with user filters into the dashboard, the corresponding User filters in these reports will be automatically added to the dashboard.
Add User Filters for the Individual Reports
You can also choose to add the user filters in the reports for that report alone in the dashboard.
To achieve this:
- Add the report with user filter into the dashboard.
- Click the more icon and select the Options button.
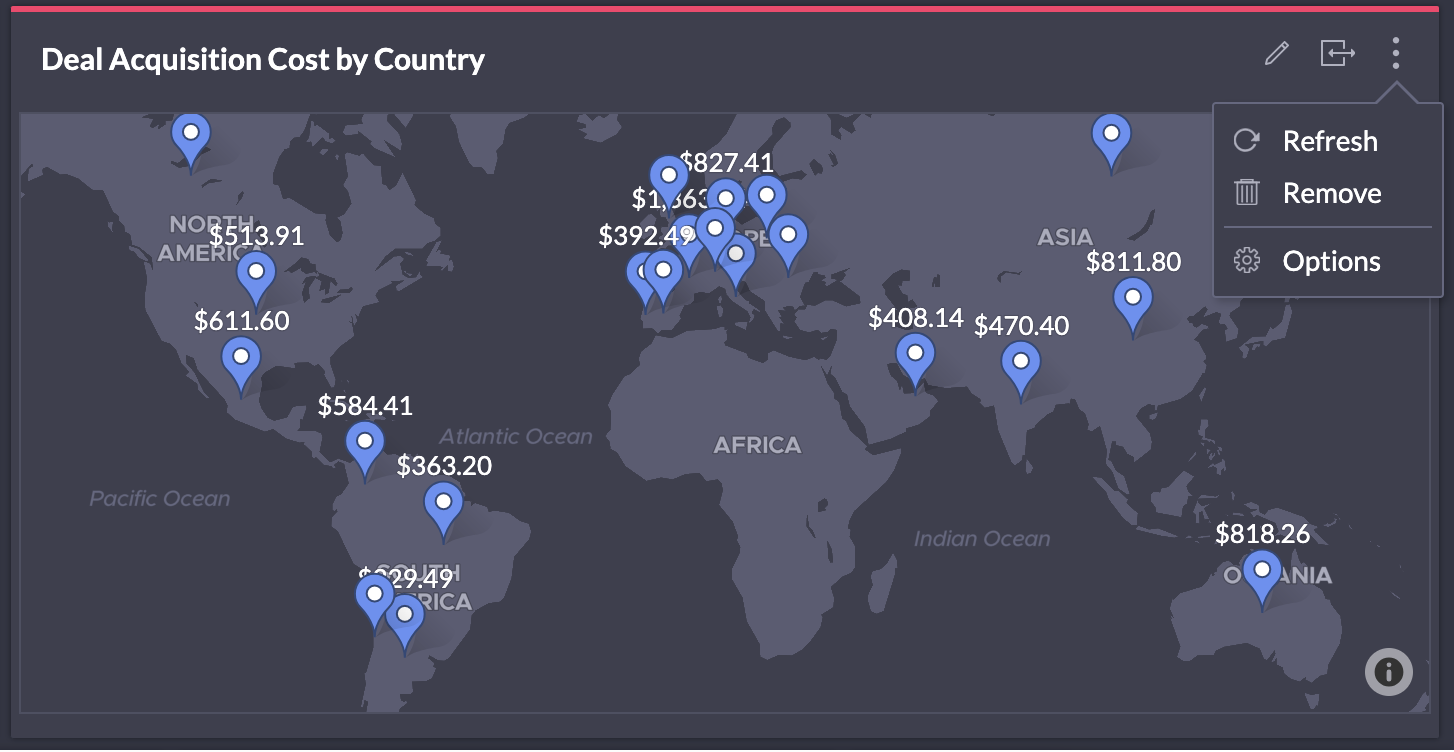
- Select the Show Report Specific User Filter checkbox.
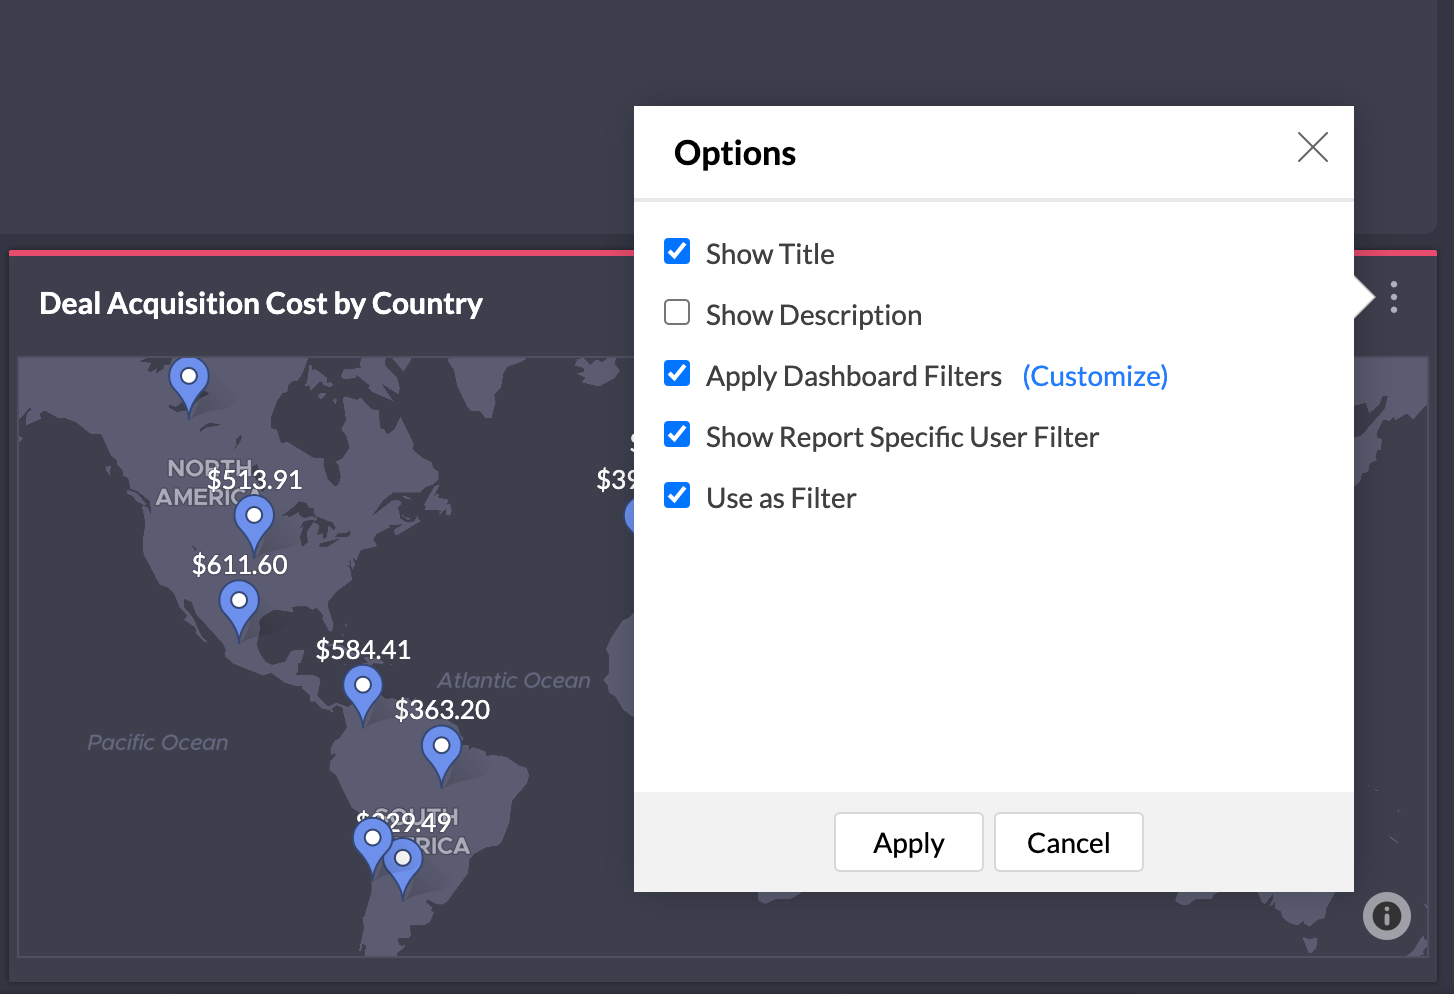
- Click Apply.
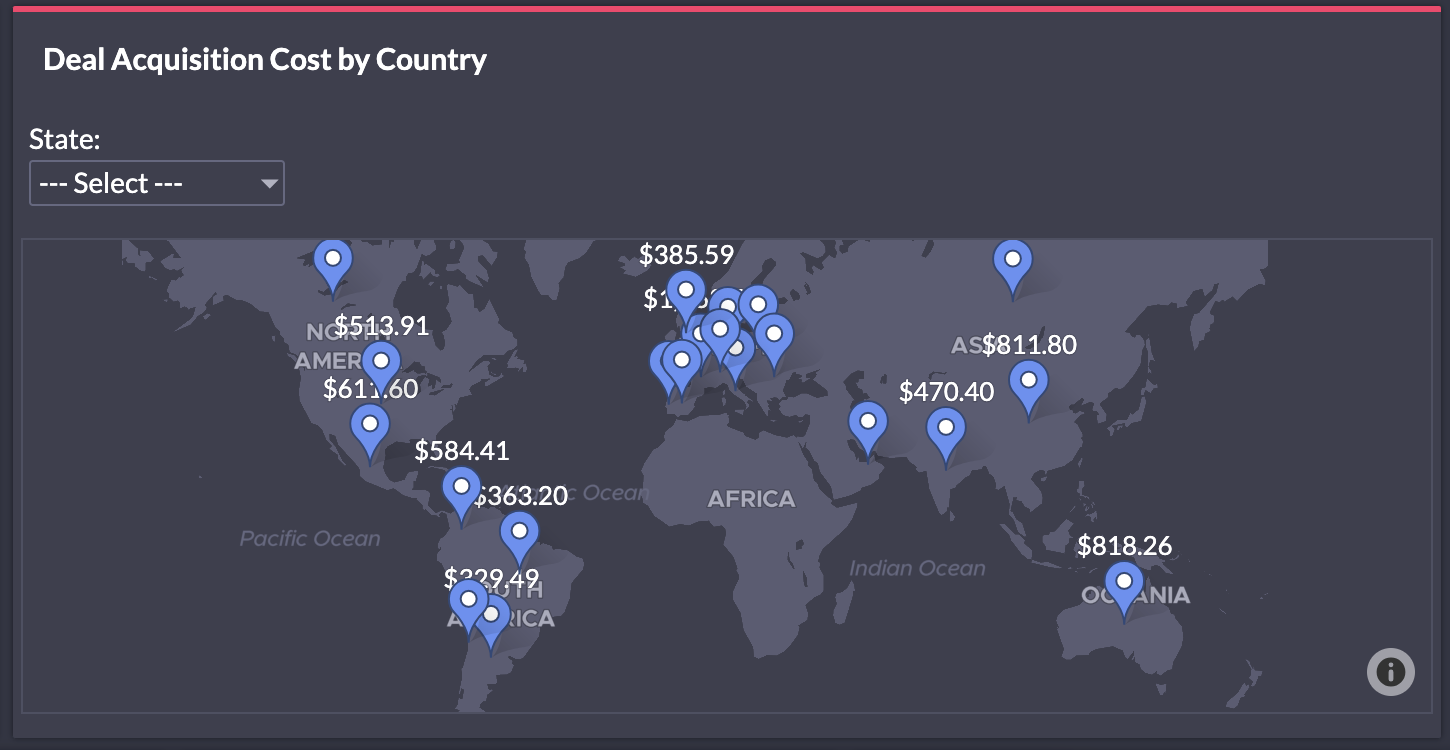
User Filters will be added to the corresponding report alone.
Global User Filter
Zoho Analytics allows you to apply the same filters across all the tabs in the dashboard with Global Filters. This helps users segment data at different levels of granularity.
Follow the below steps to apply the global filters.
- Access the dashboard in the Edit Mode.
- In the User Filters tab, select the checkbox Make User Filters Global.
- Choose your Global Filter Type dialog opens, with the following two options:
- Make Common Filters as Global - This option ensures that only matching column filters are synchronized across tabs. This approach is useful when each tab has separate filters, but a few common ones need to stay consistent.
- Make Current Tab Filters as Global - This option can be used when the same set of filters needs to be applied across all tabs. This is particularly helpful when the reports are based on the same data but spread across different tabs for easier navigation.
Filter Details | Tab level - User Filter | Common Filters as Global | Current Tab Filters as Global |
Working Process | The user filter will be applied to that particular tab. | The user filter columns which are common across tabs will be applied as a Global filter. | The User filter of any selected tab will be applied globally. |
Tab specific filters | Tab specific filters will be retained. | Tab specific filters which are not common will be retained. | Tab specific filters will be removed. |

While disabling the Global Filters, Zoho Analytics allows you to retain the current filters for specific tabs if needed.
To disable the global user filter for the dashboards,
- Unselect the checkbox Make User Filters Global.
- In case you have selected the Make Current Tab Filters as Global option earlier,
- Remove Global User Filters dialog will open.
- If you want to retain the copy of current user filters in the tabs, select the tabs from the list.
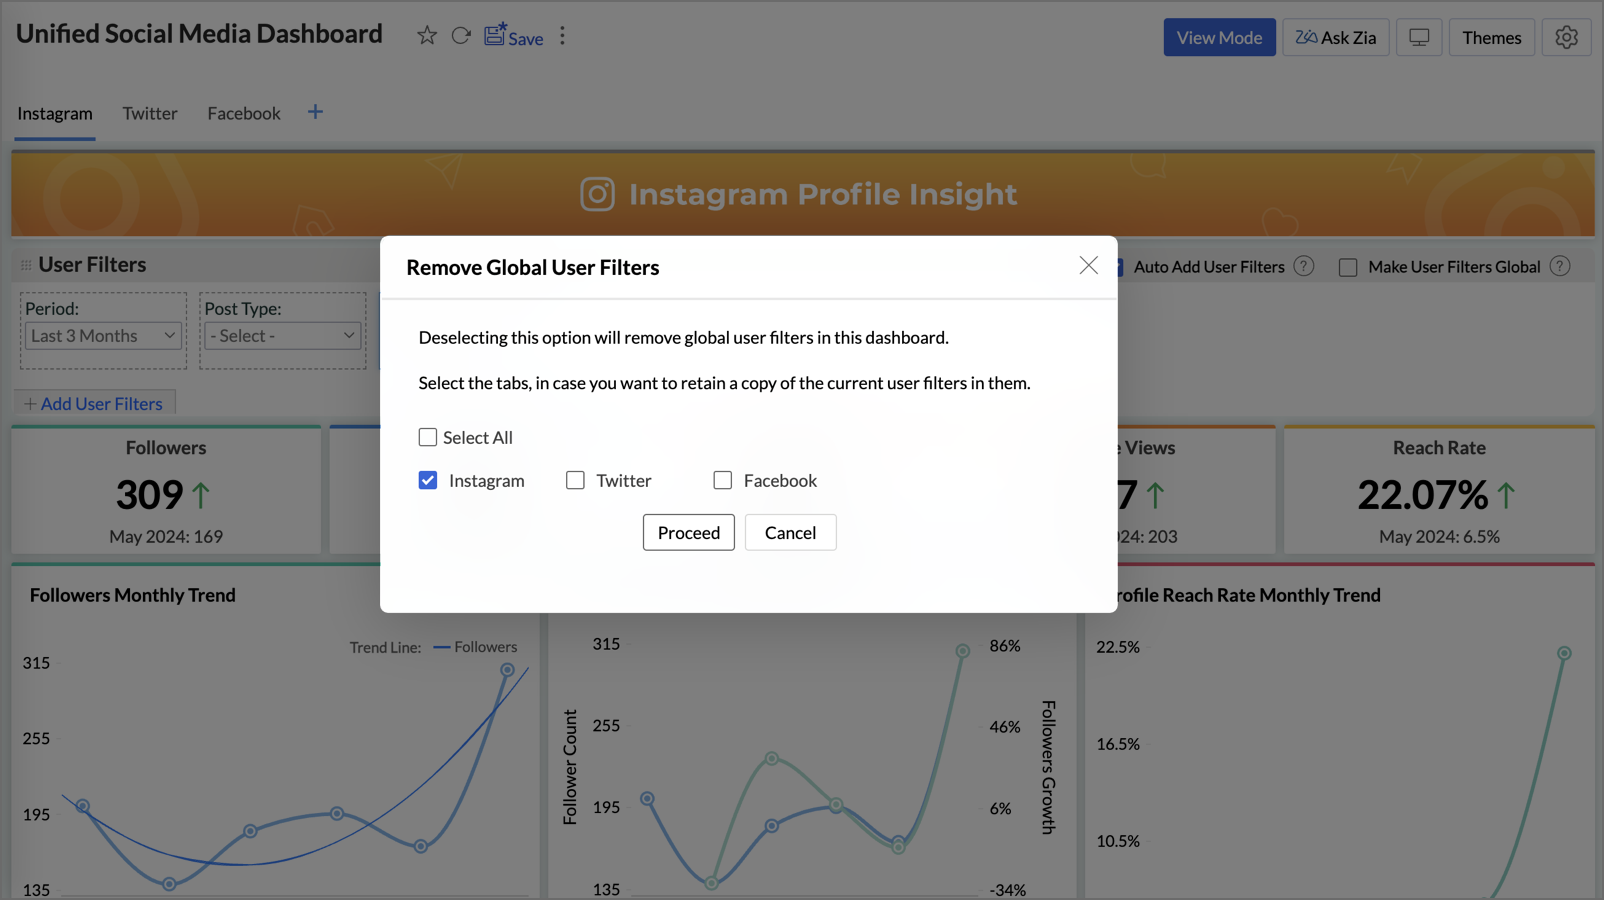
- Click Proceed.

Adding Timeline Filters
Zoho Analytics allows you to create a common Date/Period User Filter that can be applied to all the reports in a dashboard irrespective of the base tables. This user filter is not tightly bound to any date column in a single table. Using this, you can filter by any date or time range or relative period such as today, this week, last month etc. Zoho Analytics will apply the filter criteria on all reports, matching it with the best possible date column associated with the report.
Timeline Filter supports two components. They are:
- Date Range Filter - Adds a date/period user filter using a date picker.
- Time Slicer - Adds a dynamic filter with date functions like Year, Quarter, Month, Week, Date, and Hour. The selected time period in the Time Slicer automatically adjusts the date functions of views and widgets in the dashboard.
To add a Timeline Filter:
- Click the Add User Filters link.
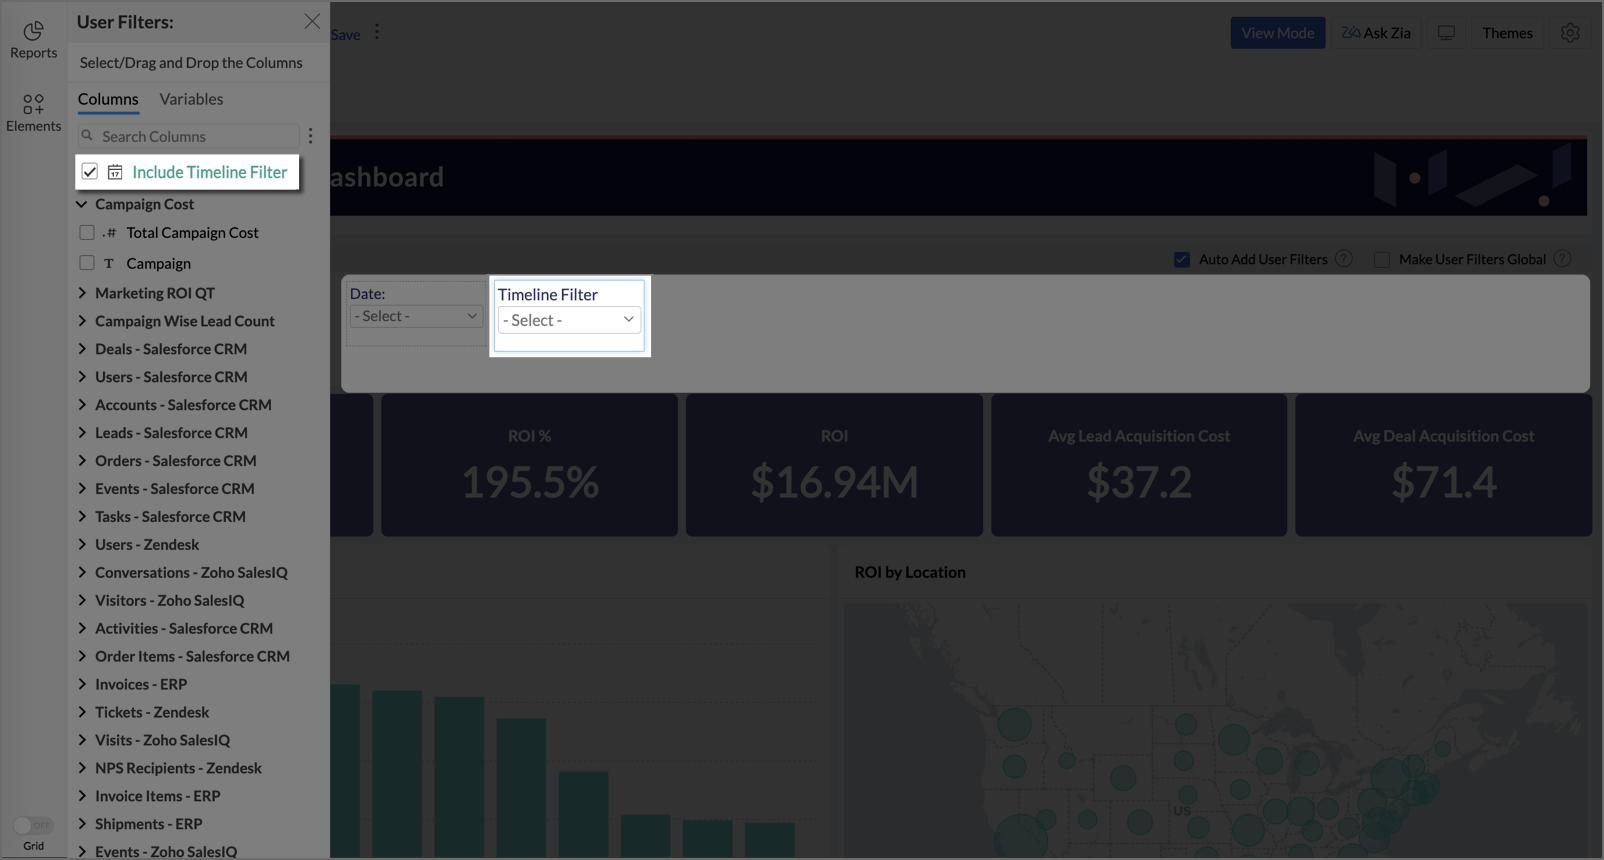
- Select the Include Timeline Filter checkbox. The Timeline Filter will be added in the User Filter tab.
- Click the Edit icon. The Edit Timeline Filter dialog will open.
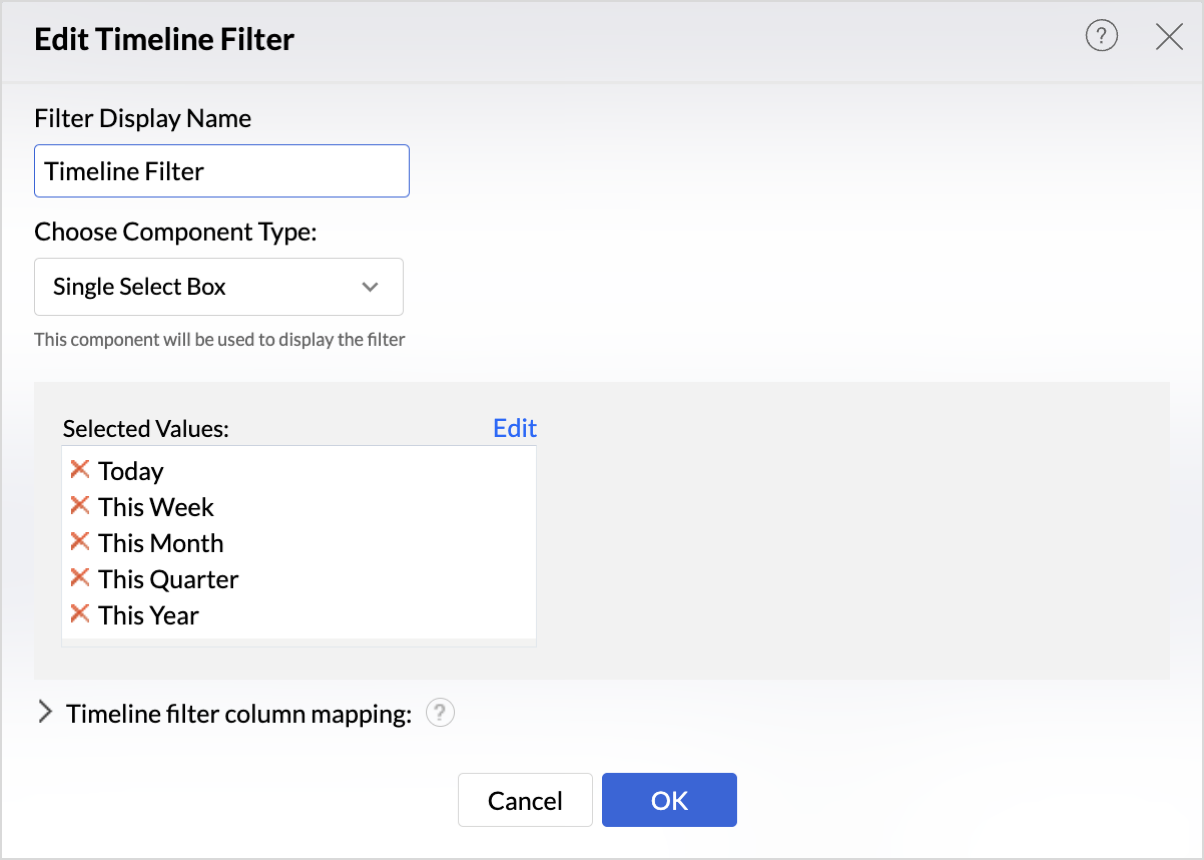
- In the Filter Display Name field, specify a name for the filter.
- In the Choose Component Type drop-down, select the type of filter you want to add. Supported options are:
- Single Select Box - Select this option to filter the dashboard by single relative date elements that you have specified, or with a custom range selected using a date picker.
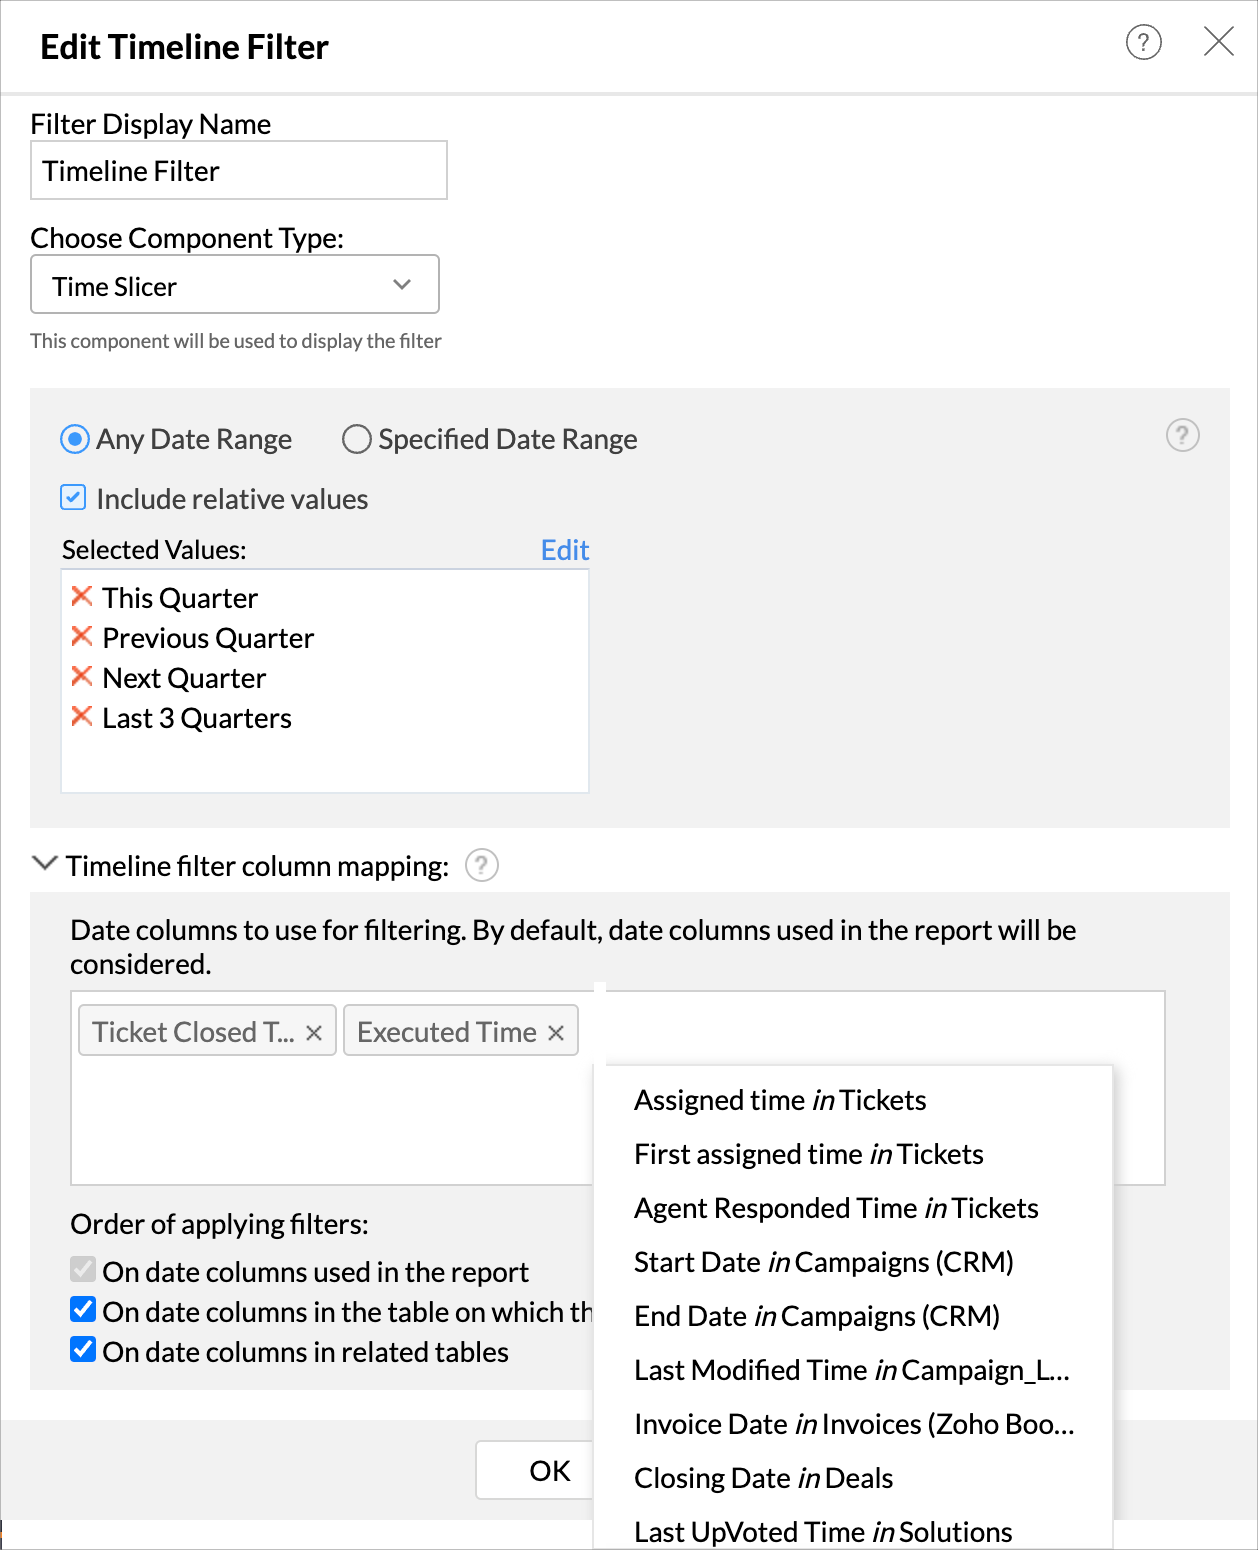
- Time Slicer - Select this to add a slider to filter by infinite date range, or by a specified date range. You can also add relative period to this filter.
Expand the Timeline filter column mapping section. This allows you to map columns to be used for filtering in case a table has multiple date columns.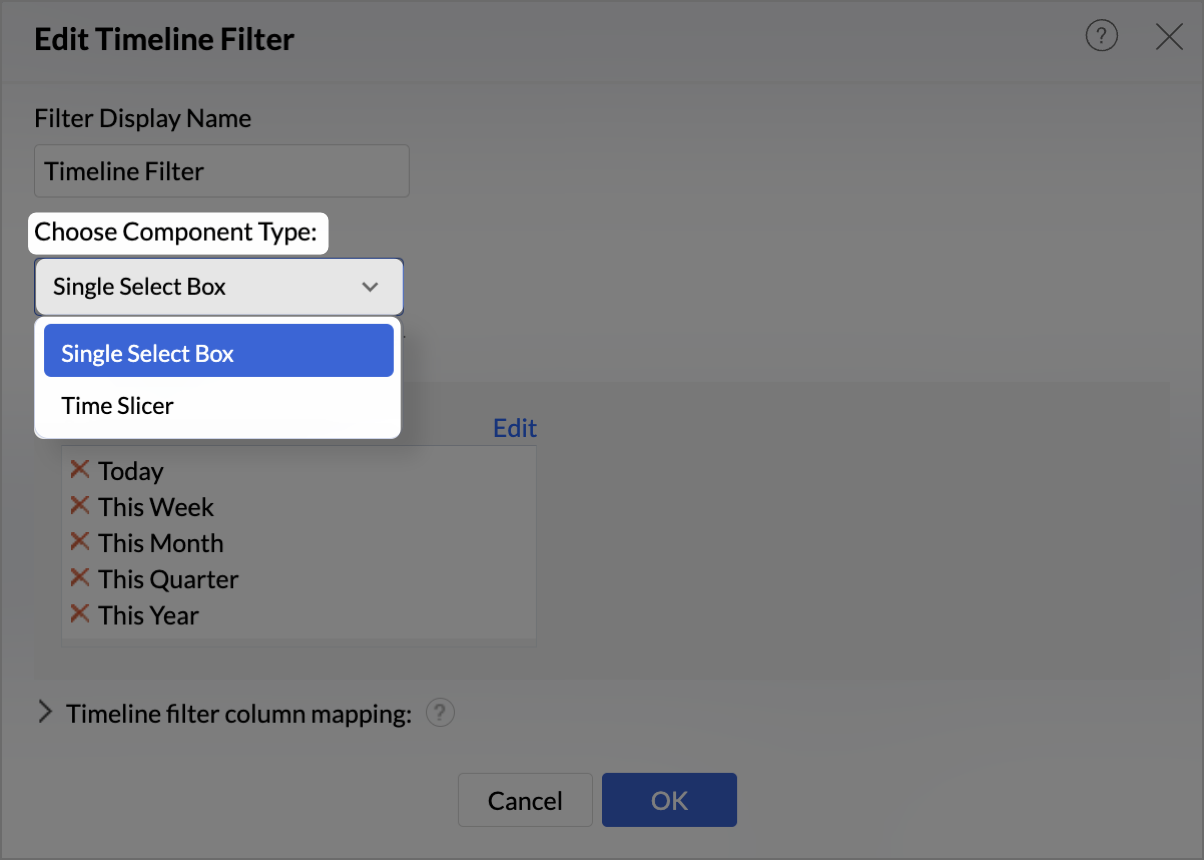
- In the Order of applying filters section, specify the order of priority to filter the reports. Available options are,
- On date columns used in the report (this cannot be removed).
- On date columns in the table on which the report has been created.
- On date columns in related tables.
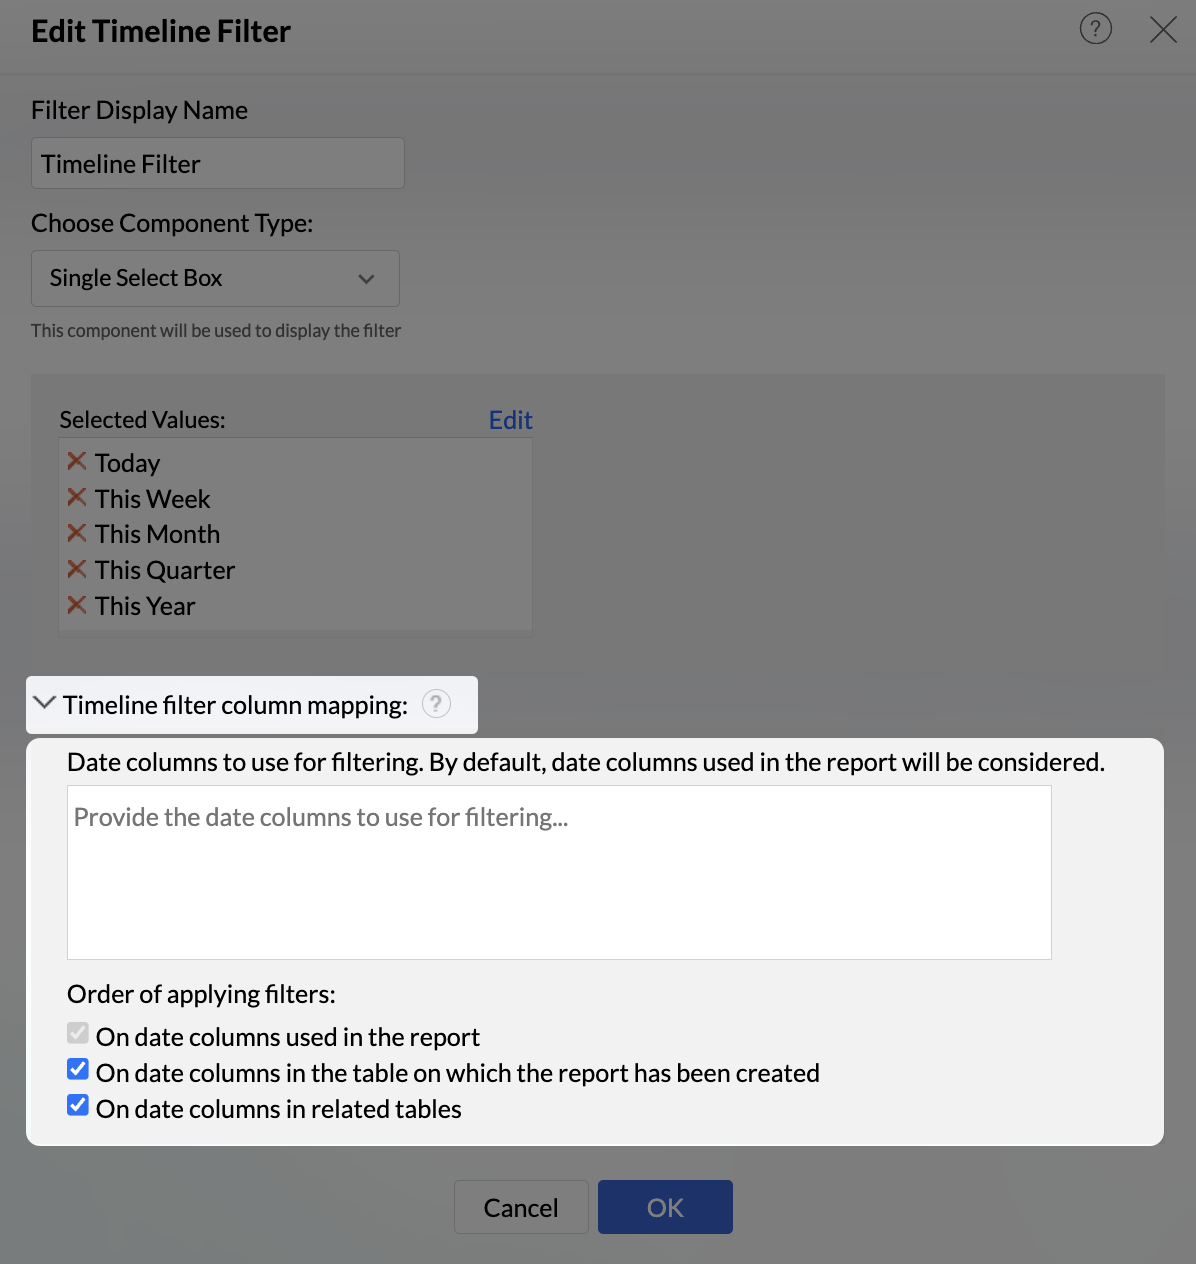
- Click OK. User Filter will get added to the dashboard.


Date Range Filter
This option allows you to filter by a custom Date Range selected using date picker in the User Filter. You can also add filters for relative period along with the data picker. By default, the following relative periods will be added as filter items along with the Date Range option.
- Today
- This Week
- This Month
- This Quarter
- This Year
You can remove these items using the Remove icon. To make an item as default filter, click the Star icon that appears on hover.
Click the Edit link to add more relative periods to the filter.

The following screen shows the Single Select Box filter as a Timeline Filter.

Time Slicer
The Time Slicer option in this filter provides dynamic filtering ability with a different section for each date element such as Year, Quarter, Month, Week, Date and Hour. This enables you to easily select the period for filtering the dashboard. The Time Slicer supports an infinite date range for filtering dashboard timelines.
Time Slicer adds a dynamic slider to specify a date range for filtering.
Select Any Date Range to add a slicer for infinite date range. You can also Include relative values as filter in this option.

Select Specified Date Range to add a slicer for a period you define here.
The following screen shows Time Slicer as Timeline Filter.

Click the Filter icon to filter by relative period that you have added to the Time Slicer.
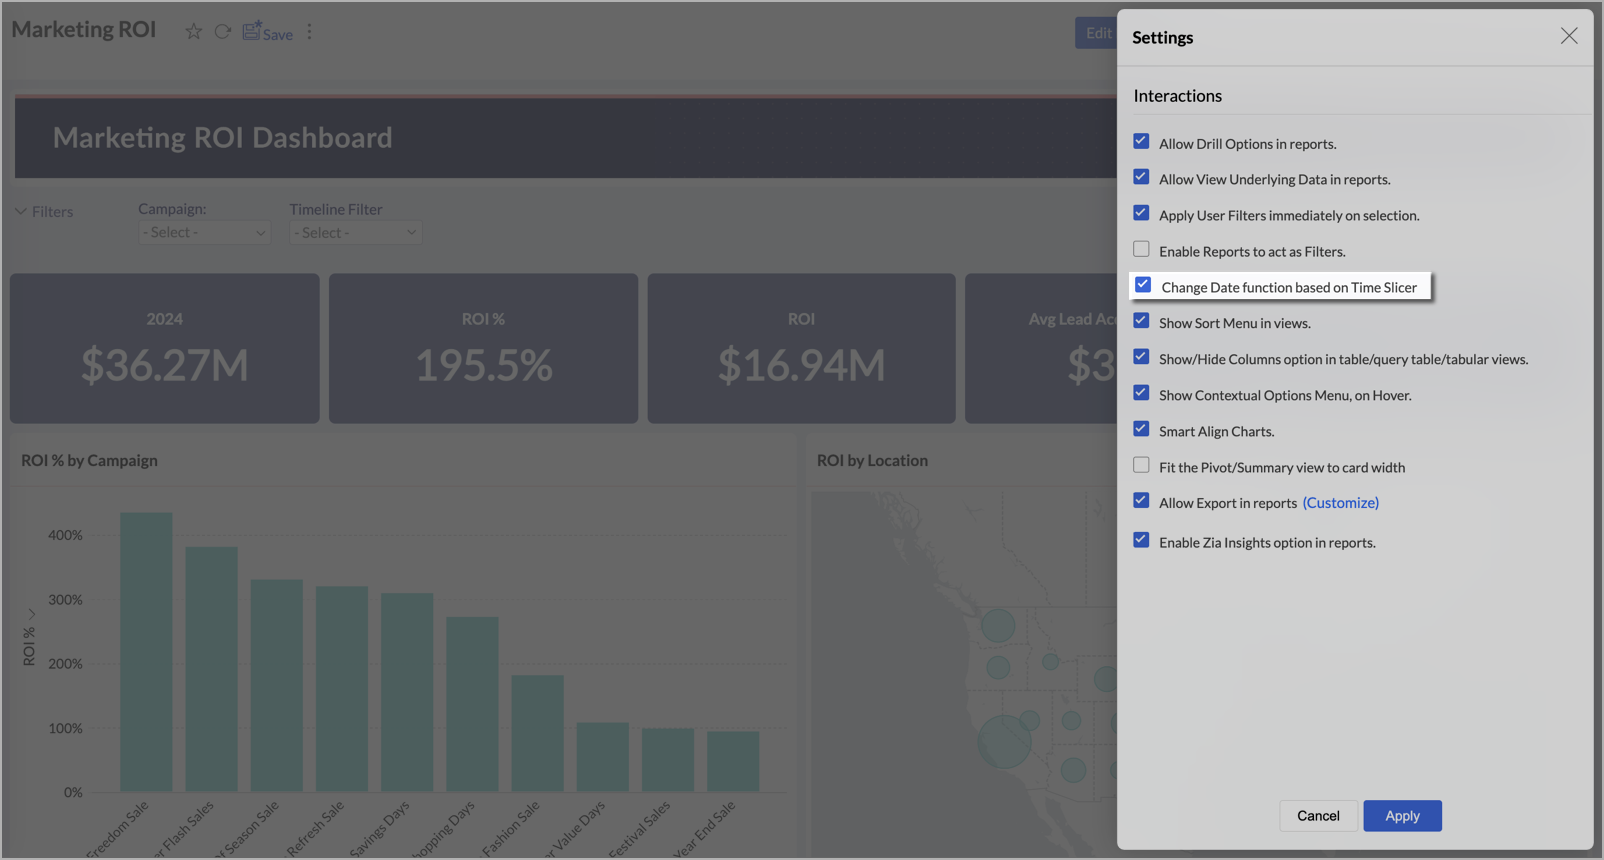
Changing date functions based on Time Slicer:
You can modify the date function of all the date columns used in the views and widgets across the dashboard based on the Time Slicer.
- Click the Settings icon at the top right to access Dashboard Interactions.
- In the Settings tab, under the Interactions section, enable Change Date function based on Time Slicer to apply the Time Slicer’s date function to all views and widgets with date columns.
- To retain the original date function for a specific view or widget:
- Click the More icon next to the view or widget.
- Select Options from the menu.
- Uncheck the Change Date function based on Time Slicer and click Apply.
- The selected view or widget will keep its original date function and won’t be affected by the Time Slicer.


Mapping Columns
Timeline filters are not bound to any column. However, when your table has multiple date columns, Zoho Analytics allows you to configure the date column to filter the data.
The Timeline filter column mapping section in the Edit Timeline Filter dialog lists all the date columns in your tables. Select one column per table to map date column for filtering. When Timeline filter is applied, the data will be filtered based on these columns.
You can also configure to filter an individual embedded report by a different date column.
To do this:
- Click the More icon, and select the Options button for the corresponding report.
- The Mapping Timeline Filter option will list all the relevant date columns. Select the column to filter this report.
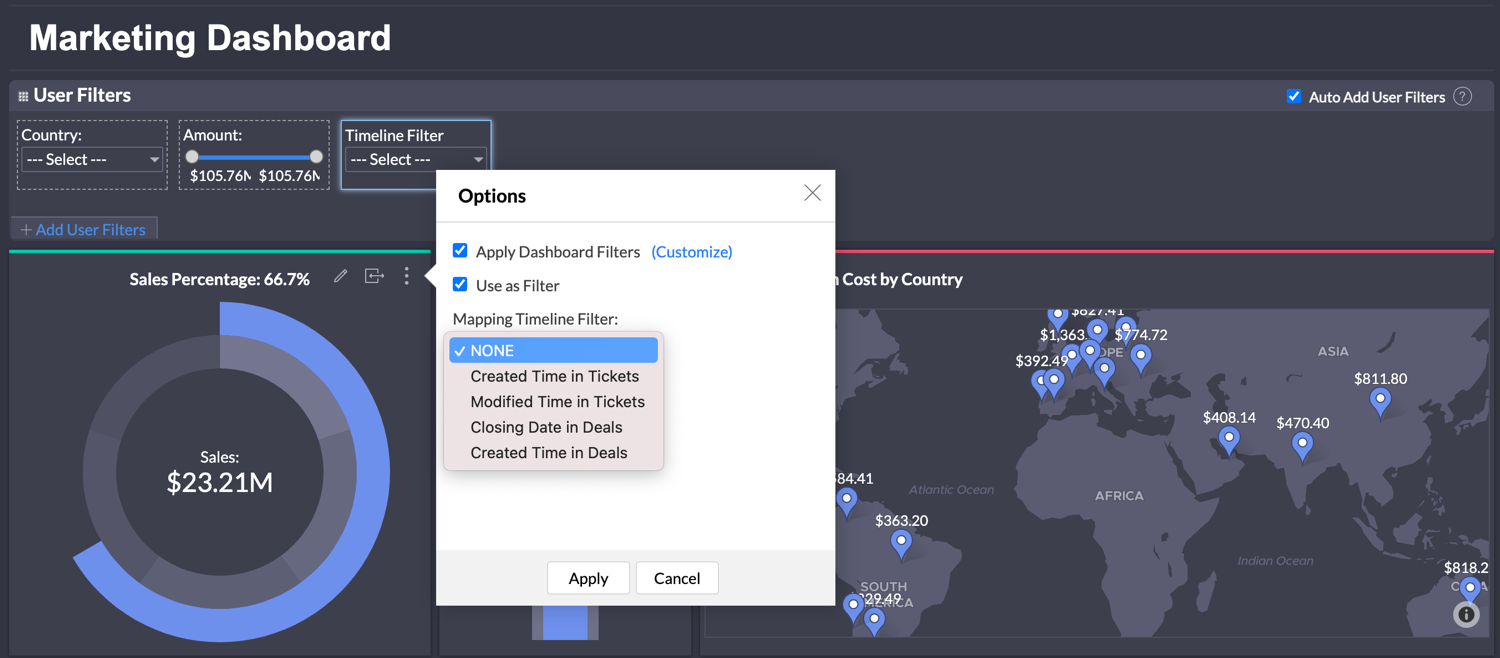
- Click Apply.

When Timeline filter is applied, this report alone will be filtered by the set column.
Merging User Filters
Dashboards have reports from different tables, and these tables may have columns of the same type and records like regions, amounts, and product categories. Applying multiple filters of the same type will not be user-friendly, as it could be difficult to find which filter applies to which table. Hence, Zoho Analytics allows you to merge filters.
- Merge filters manually.
- Auto-merge of user filters
Merge Filters
You can merge user filters by simple drag and drop on top of the other.
You can modify the merged column mapping by following the steps below.
- Click the Edit icon for the merged filter. The Choose Component for User Filter dialog will open.
- Click the Edit Column Mapping link. The Column Mapping dialog will open.
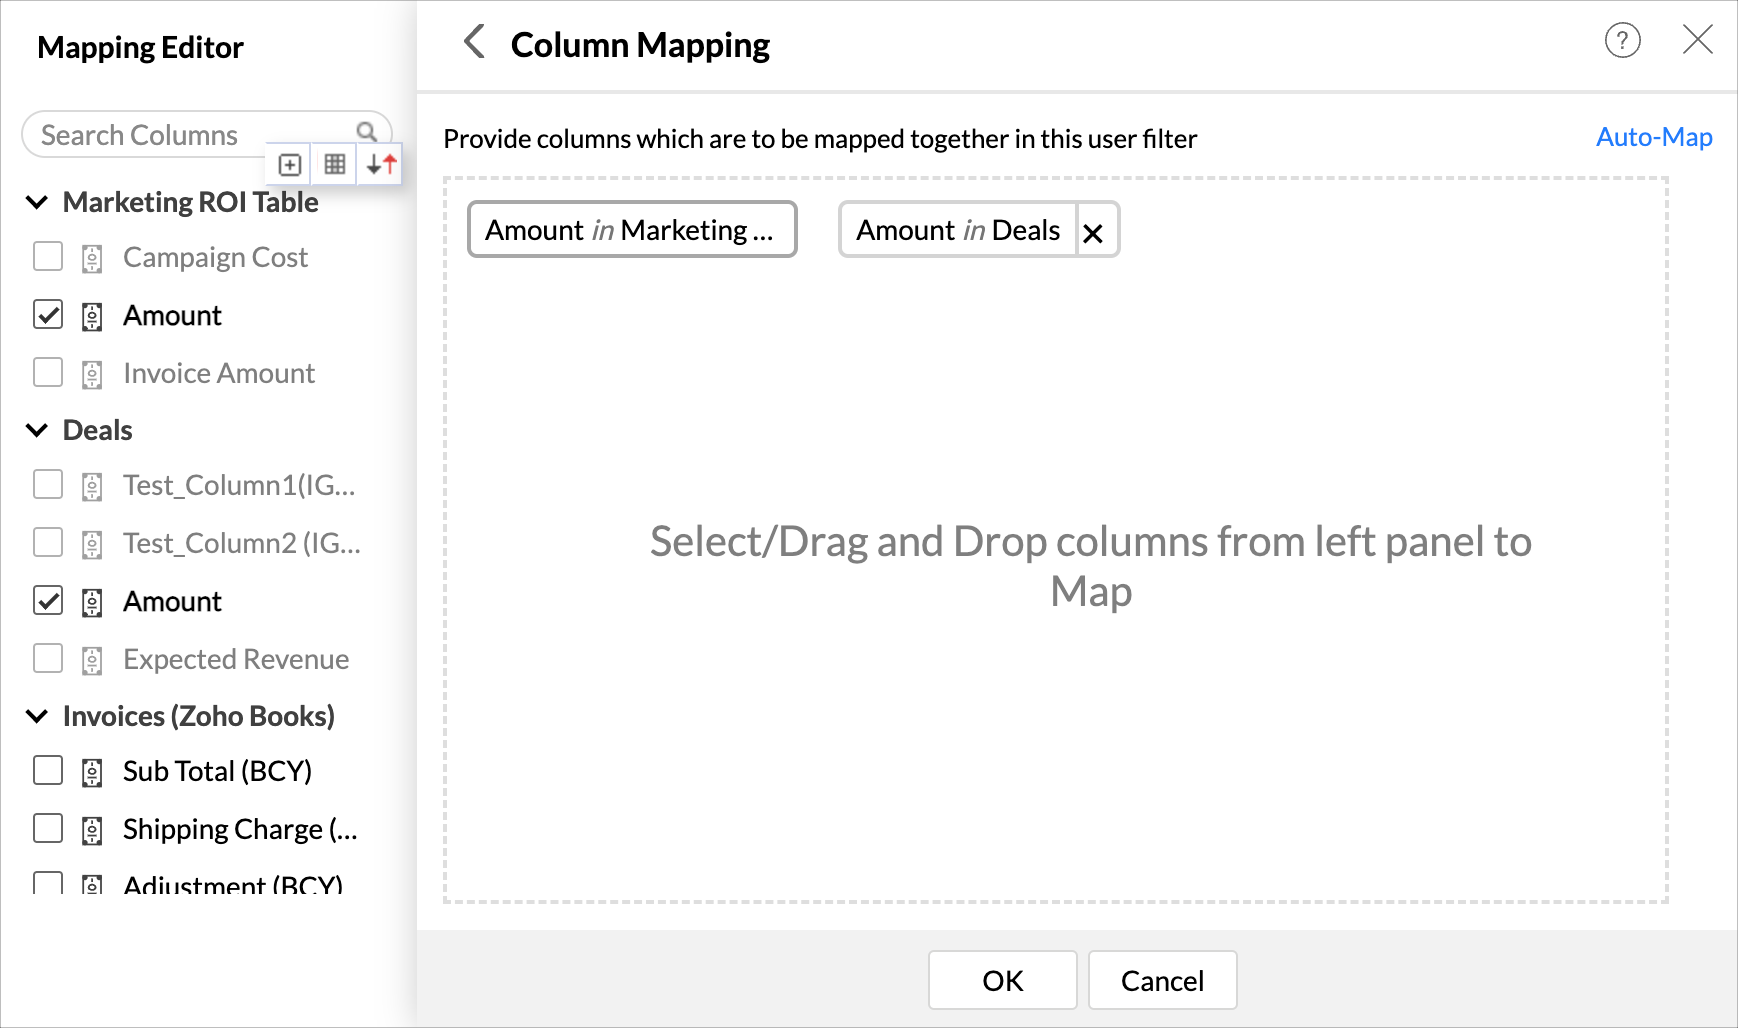
- Modify the columns as needed.
- Click OK.
Note:
- You cannot remove the primary user filter column over which other User Filters are merged.
- Values from this primary column alone will be listed as filter values.
- You cannot merge two columns for the same table into the same User Filter.
- You cannot merge two columns with different data types in a User Filter.
- You can merge columns with similar data types in the same category. Such as Number, Decimal Number, and Positive Number can be merged.
The following conditions should be met for Zoho Analytics to map and merge columns automatically.
- The filter columns should be from different tables.
- The Column Name should be the same in the tables.
- The columns should have the same Data type, Sub type, and Operation.
- The Auto-Add User Filters option should be enabled in the dashboard designer.
Mapping Different Columns for Individual Report
Zoho Analytics allows you to filter an individual report by a different column when applying a merged filter. Let's say you have a BugTracker dashboard and have configured to filter the reports by Bug Assignee Name. You have a report for Bugs Reported By Name. Now, you can use this option to filter this report alone by a different column when applying merged filter.
Follow the below steps to do this.
- Click the More icon, and select the Options button for the corresponding report.
- Click the Customize link adjacent to the Apply Dashboard Filters checkbox.
- The Customize dashboard filters dialog will open listing all the filters.
- Select the column you want to map for this report.
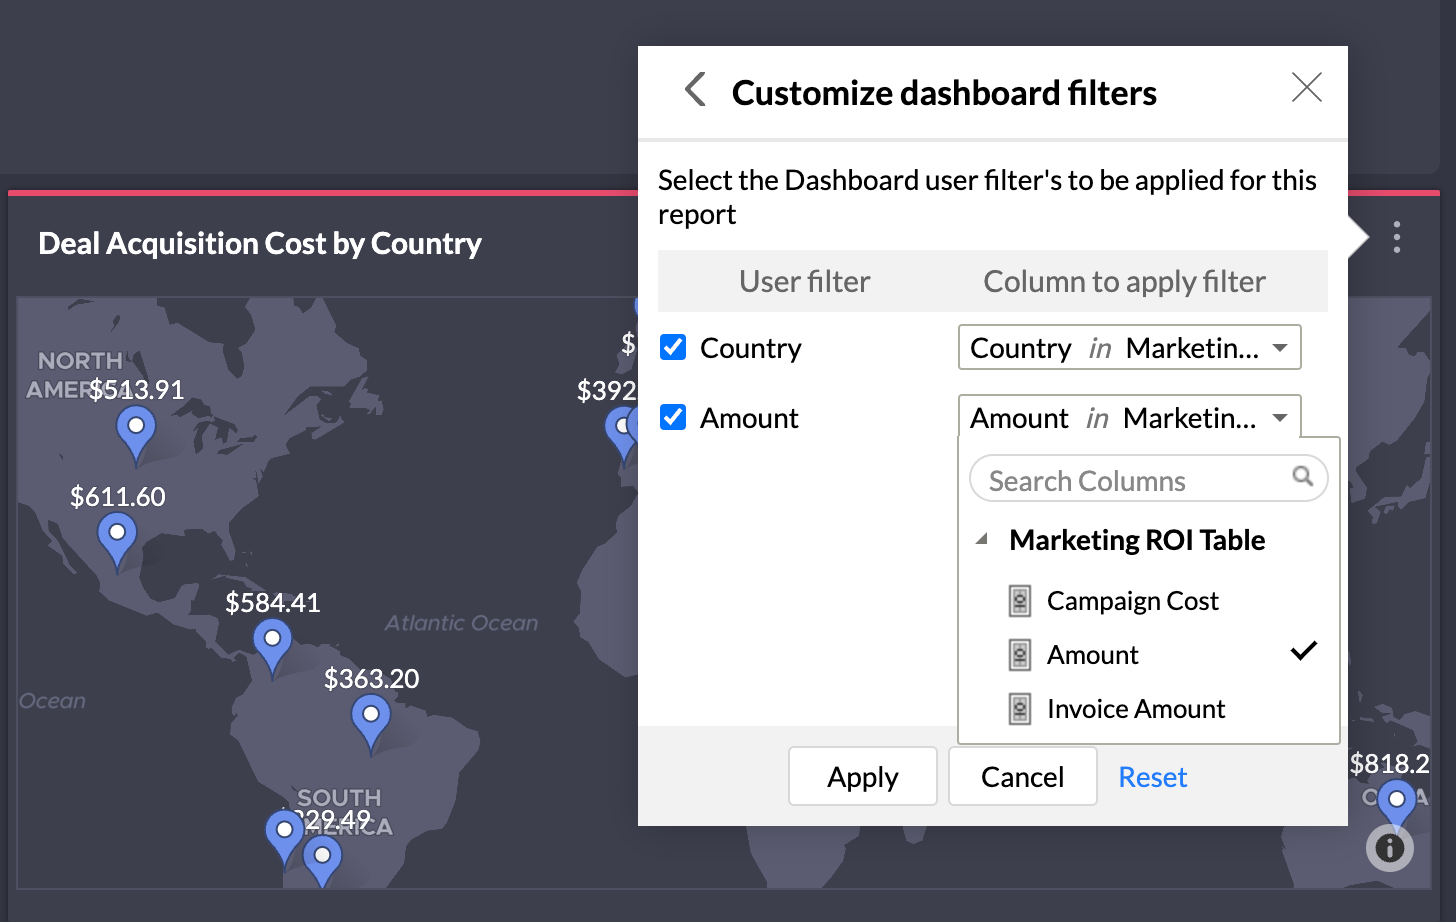
- Click Apply.
When merged filter is applied, this report alone will be filtered by the set column.
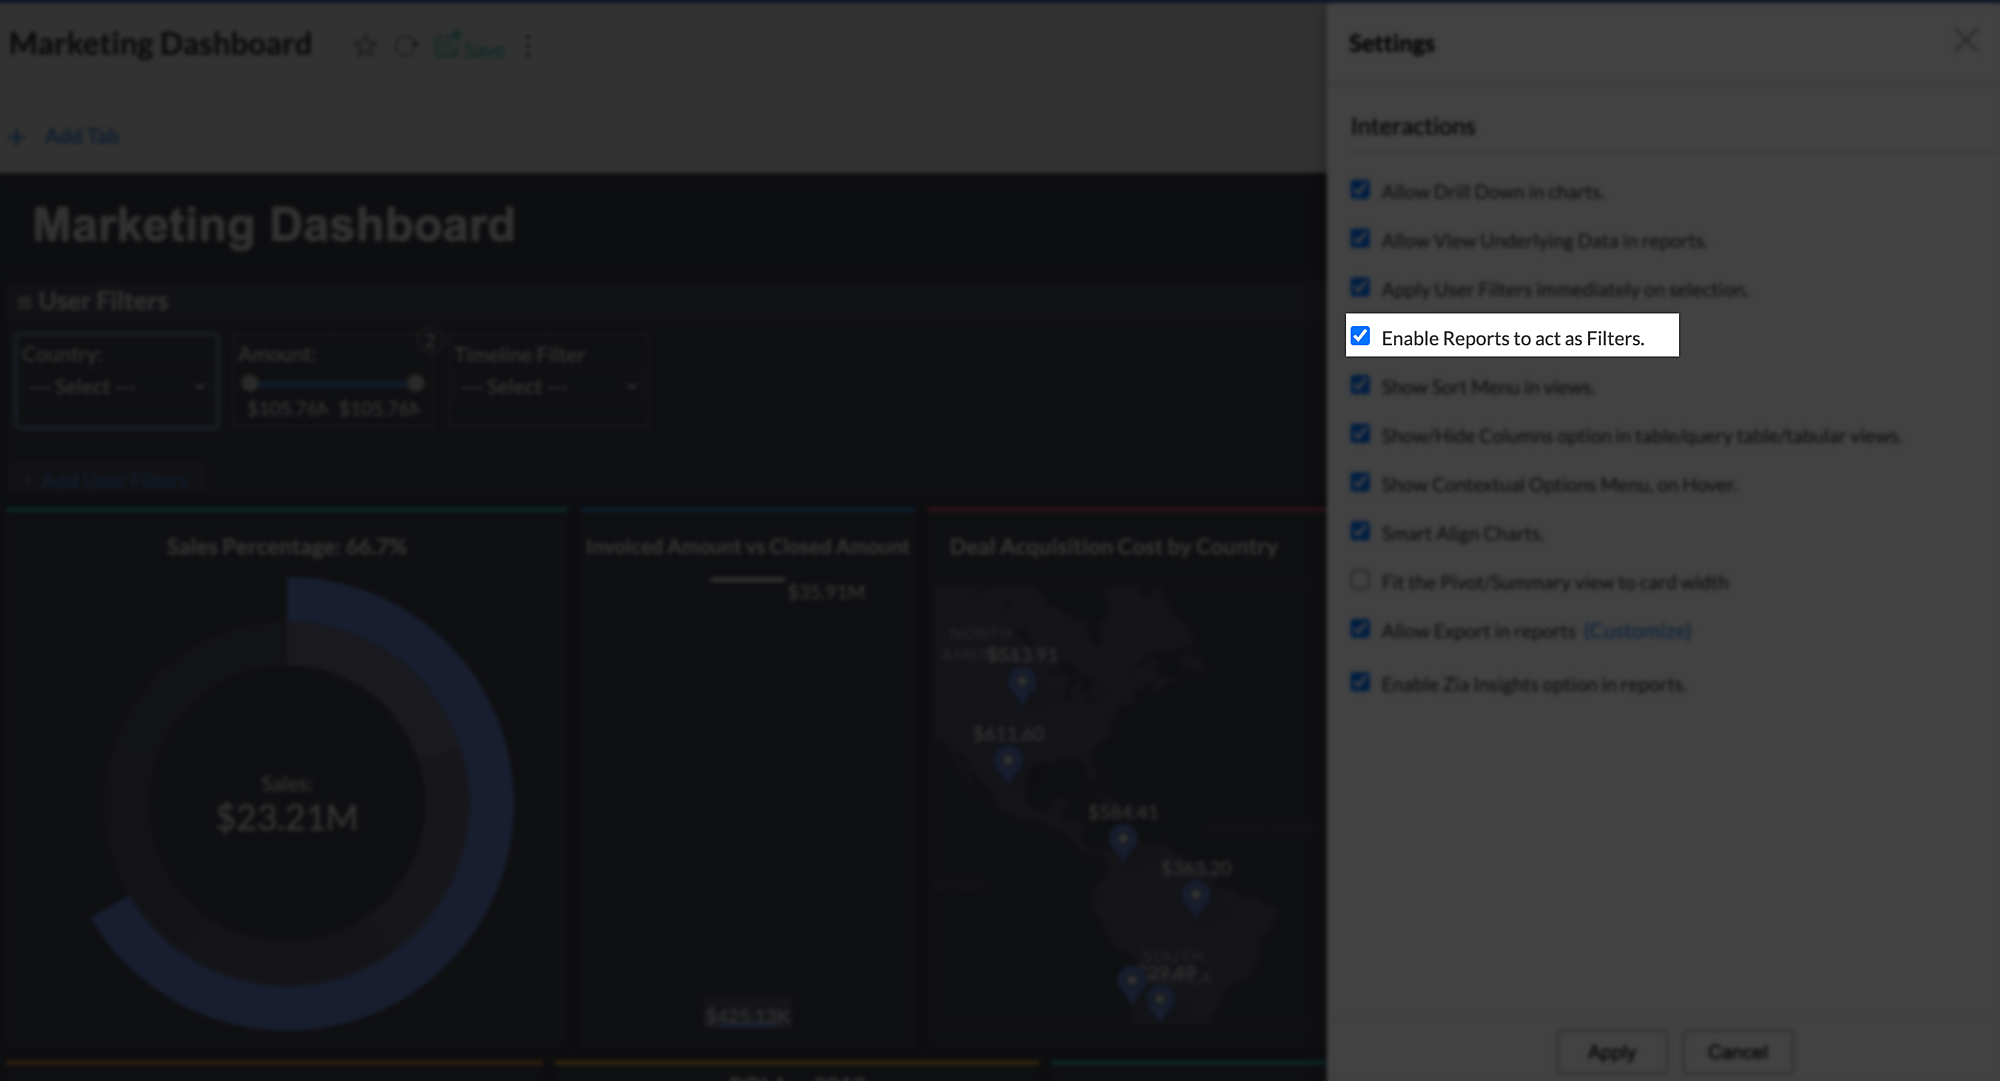
Reports as Filters
Zoho Analytics allows you to set reports to act as filters in your Dashboard. By doing so, you will be able to click on any data point, and filter all other dependent views based on the value.
To set a report as filter, you need to enable this in the Dashboard Settings dialog. Select Enable Reports to Act as Filters to allow reports to act as filters.
Follow the below steps to do this.
- Click the More icon, and select the Options button for the corresponding report.
- Select the Use as Filter checkbox.
- Click Apply.
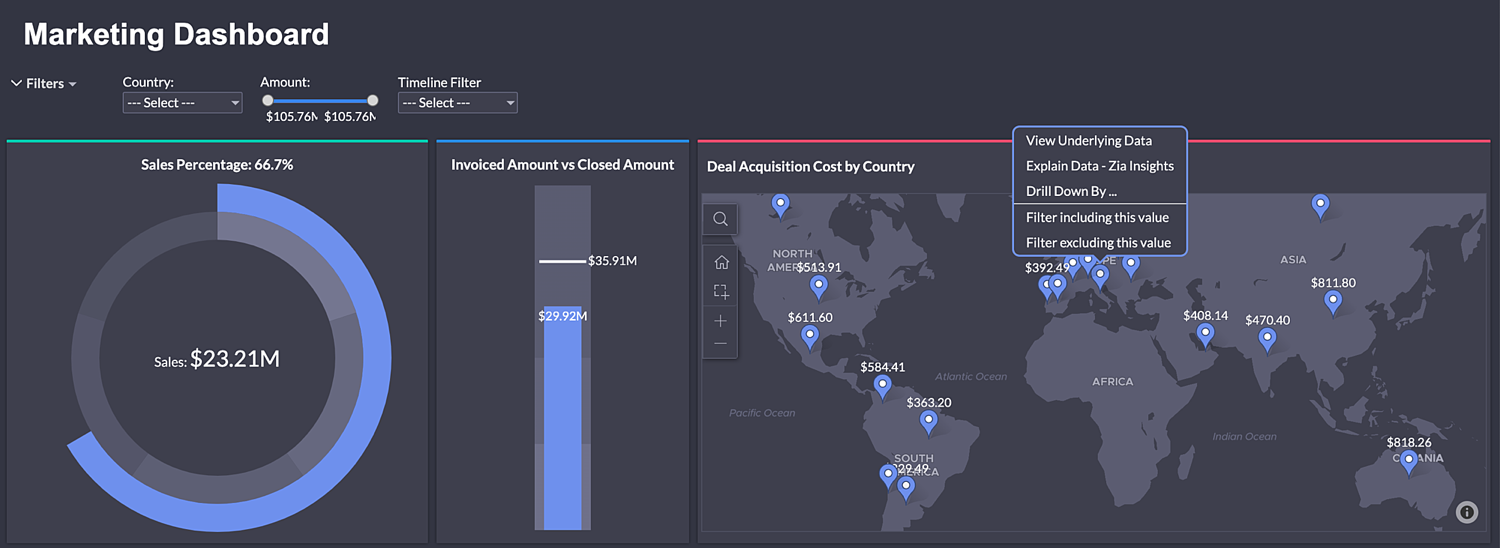
Now, you can click on any data point, and filter all other dependent views in the dashboard. Reports as Filters allows you to filter by the following filtering options:
- Filter including this value - The selected value will be filtered in the Dashboard.
- Filter excluding this value - The selected value will be excluded from the Dashboard.
Combined User Filter as Preset
You can define a preset filter by combining multiple user filters. This eliminates the mundane task of clicking and selecting values from multiple user filters every time. And you can have multiple preset filters too.
Follow the below steps to define a Preset Filter.
- Apply the User Filter combination you want to save. For example, you need to see the data for Canada this year.

- In Filter, click Save. Please note that if you have saved a Preset Filter already, then you need to click Save As to avoid overwriting and save this as a new combination.
- The Save As dialog will open. Specify a unique Name.
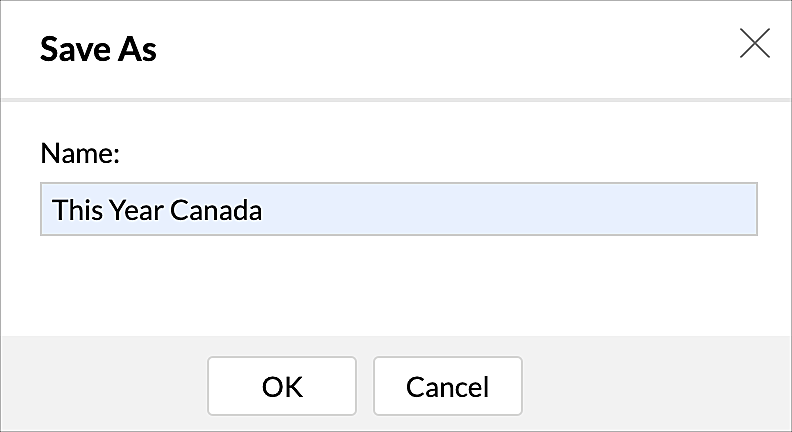
- Click OK.
- Repeat the above in case you need multiple preset filters. In the screenshots shown, one preset filter can be this year data for India, the next preset filter can be last year data for the USA, etc.
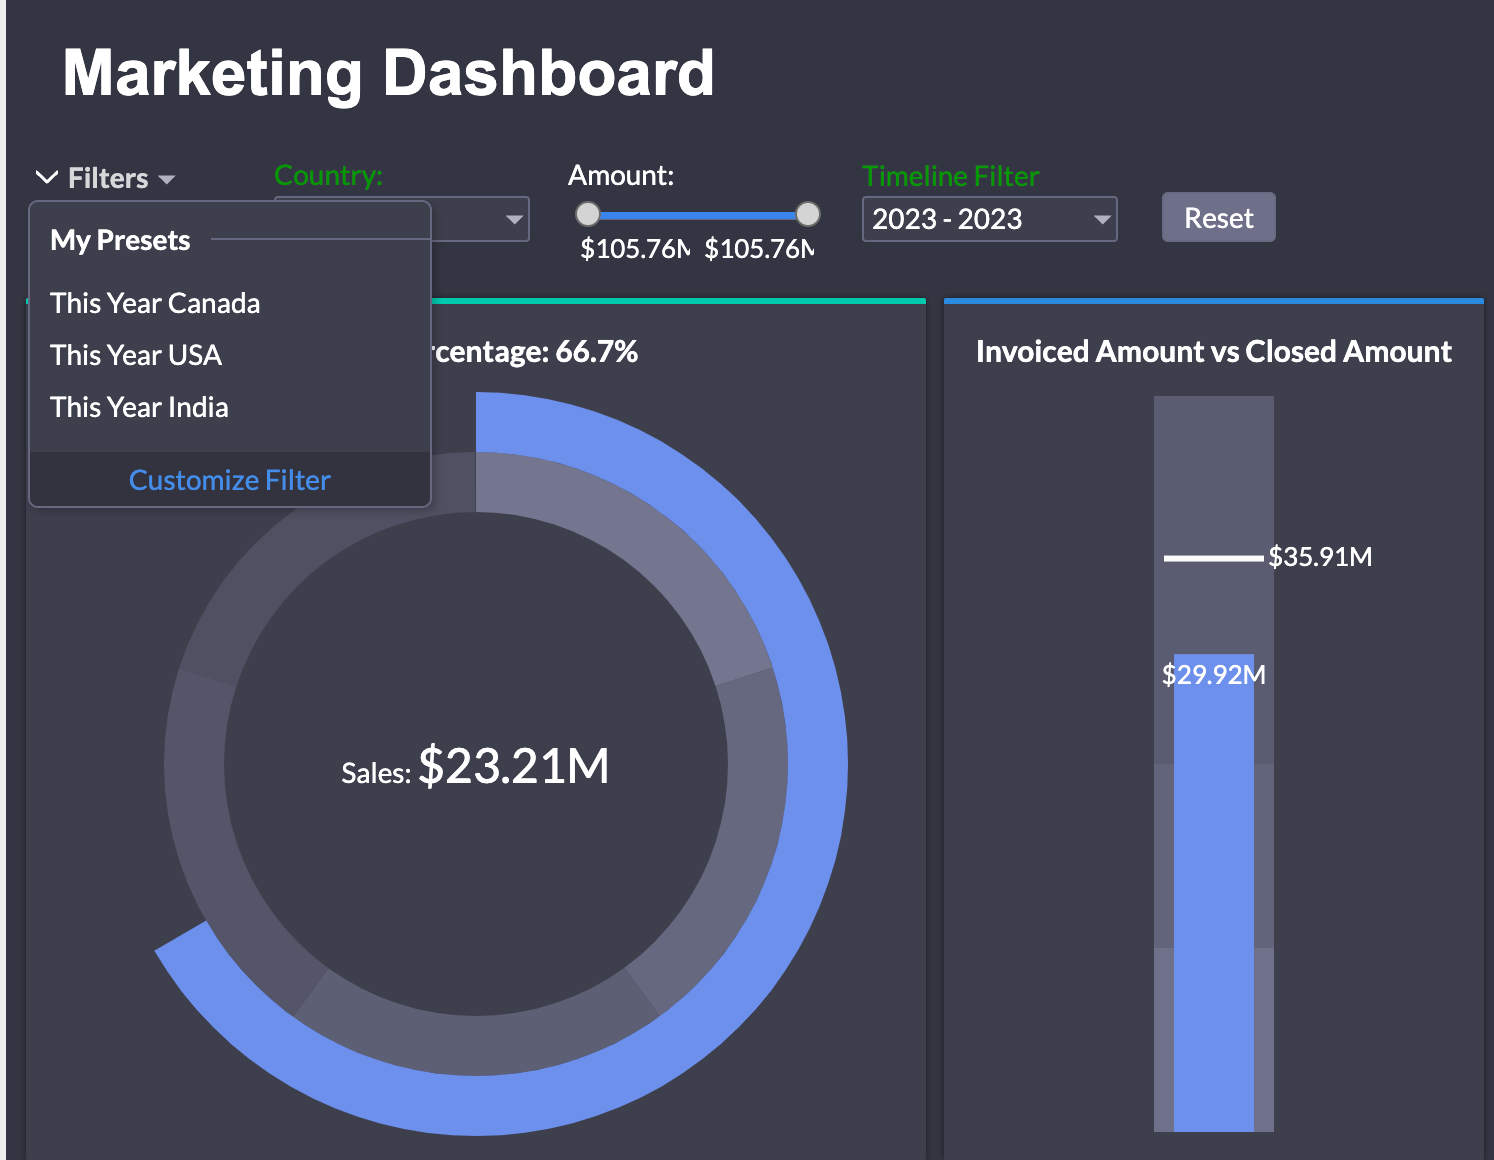
- As you select the filter, the defined user filter combination will be applied over the dashboard.
You can choose to rename or delete the Preset filters by clicking the Customize Filters link.
Click the Edit icon to rename, and the Trash icon to delete a Preset Filter.
Sharing Preset Filters
Preset filters can be shared along with the dashboard. You can modify the share permissions to allow the shared user to access the saved presets and to create their own presets for your dashboard. Click here to learn more.

Exclude Report from Dashboard Filters
You can choose to exclude a report from all dashboard filters. To do this.
- Click the more icon and select the Options button for the corresponding report.
- Unselect the Apply Dashboard Filters checkbox.
- Click Apply.
The report will not be filtered when any of the dashboard filters are applied.
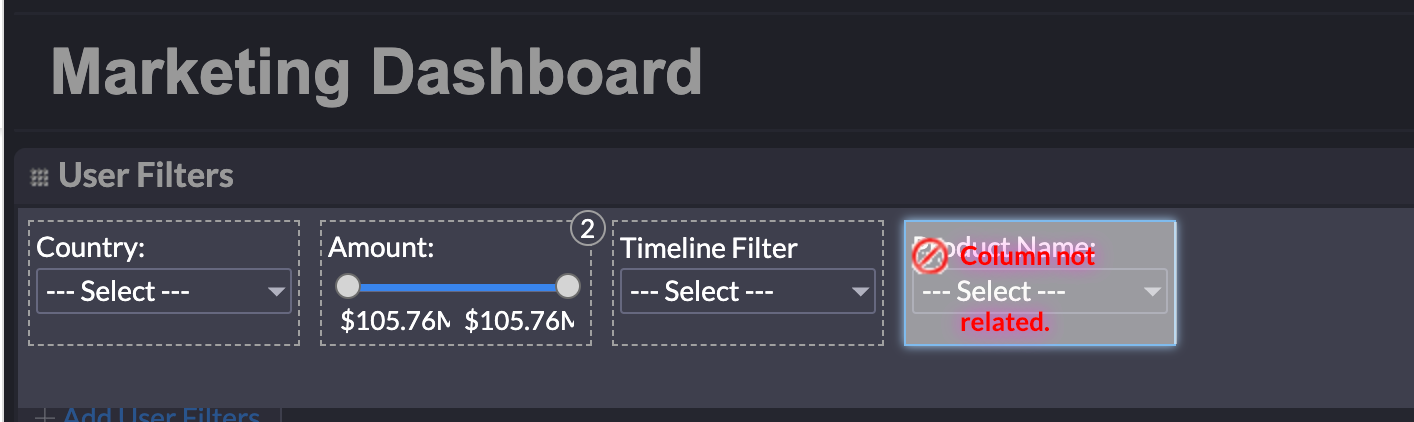
Invalid Filters
When the added user filter column does not have any relevant report in the dashboard, or they are removed from the dashboard, then Zoho Analytics will display an alert over a user filters column. You can remove this by clicking the trash icon. You cannot save the dashboard without removing these columns.