Adding Customers
Table of Contents
As a Partner of Zoho Workplace, you can add customers to your Partner account. You can do this from the Partner Store Portal or Partner Console.
Adding New Customers
Adding new customers from Partner Console
- Login to your Zoho Mail Partner account.
- Navigate to the Admin Console.
- Click on the Partner console option on the left menu.
- Click +Add in the Manage Customer tab to create a child organization for your client.
- Provide the following details:
- Organization Name - Name of the Organization you are creating.
- Primary Domain - Name of the domain used for the Organization you are creating.
- First Name - First Name of the Super Admin account of the organization you are creating.
- Last Name - Last Name of the Super Admin account of the organization you are creating.
- Contact Email Address - The email address to which the verification email should be sent.
- Plan Purchase - The Zoho Workplace or Mail plan that the organization will subscribe to.
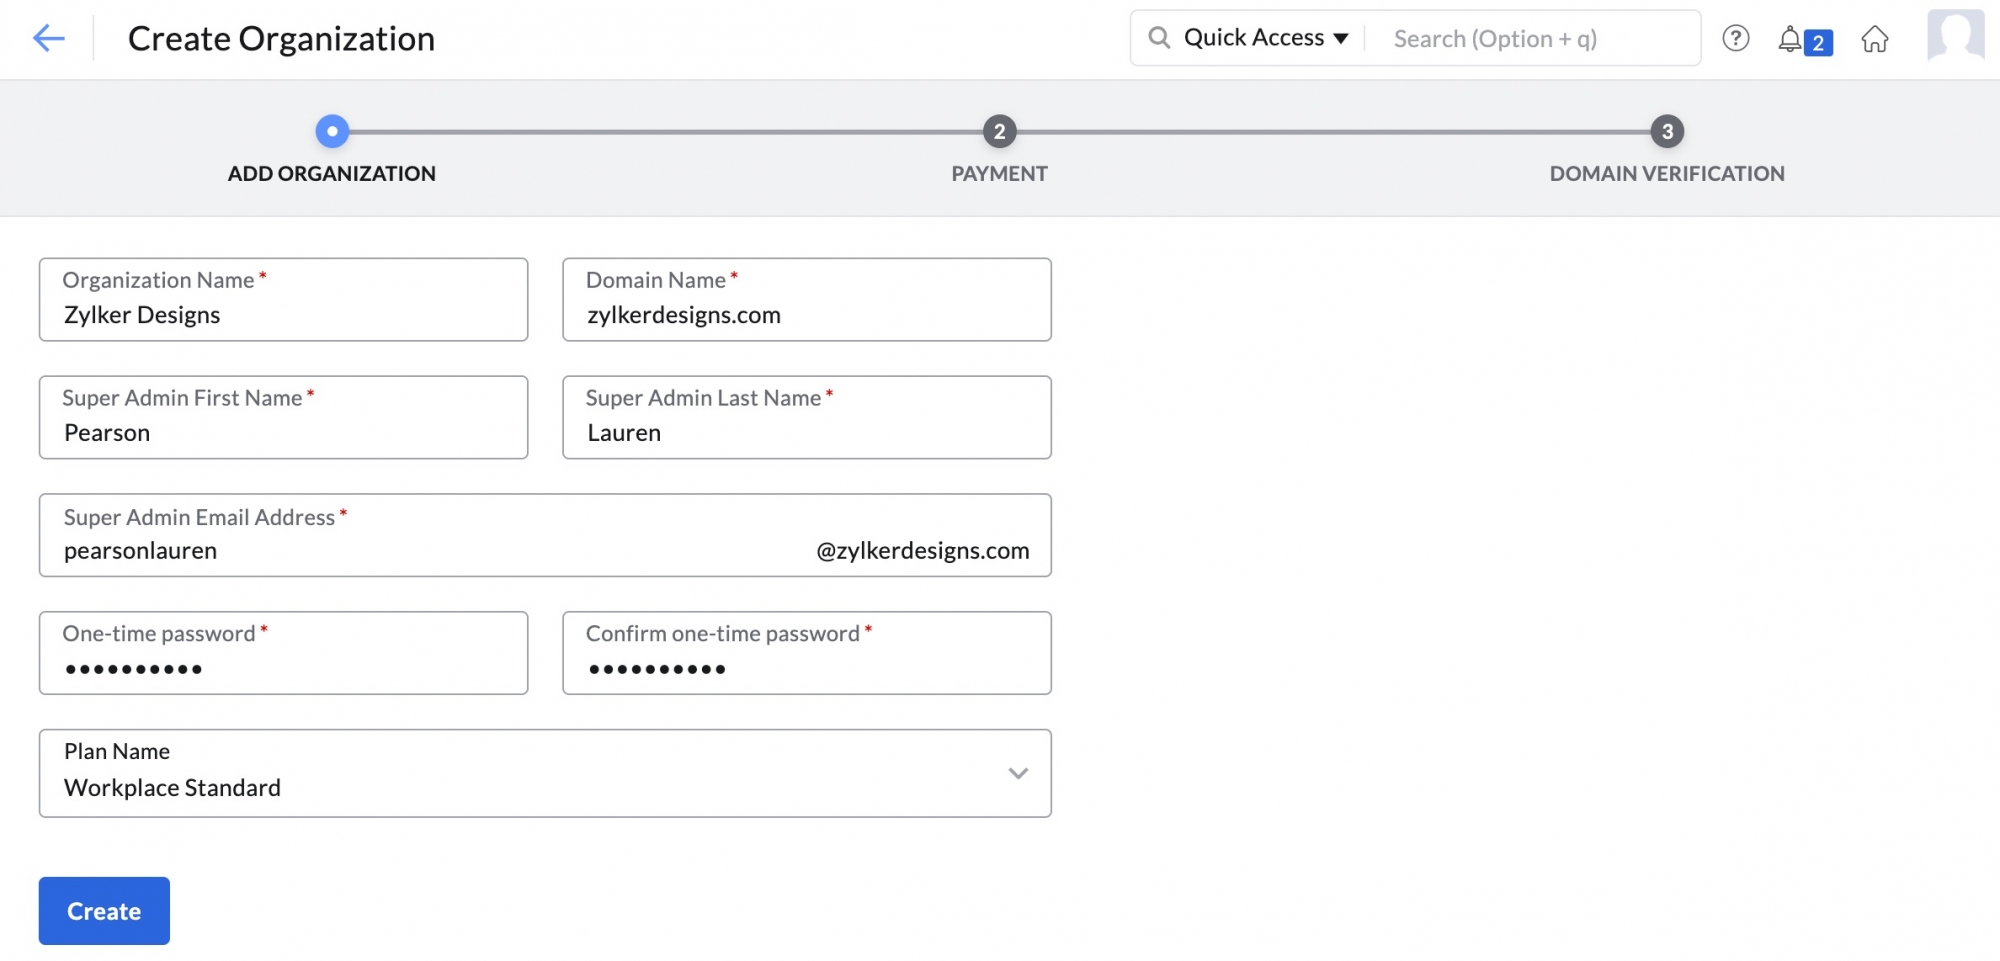
- Click Create.

The new organization will be created. A verification email will be sent to the provided email address. On verification, the organization setup will be completed.
If you wish to create a One Time Password (OTP) for the created Organization, select the I want to set One Time Password (OTP) for my customer's account checkbox. You will be asked to provide a password that will be set as the OTP. Your client will be prompted to change this password on the first login.
Adding new customers from Partner Store
You can use a SignUp code generated in the Partner Store Portal to add customers to your Partner account.
- Login to Zoho Partner Store.
- Click on the Customers tab in the left menu.
- Select the SignUp code section under the Customer tab.
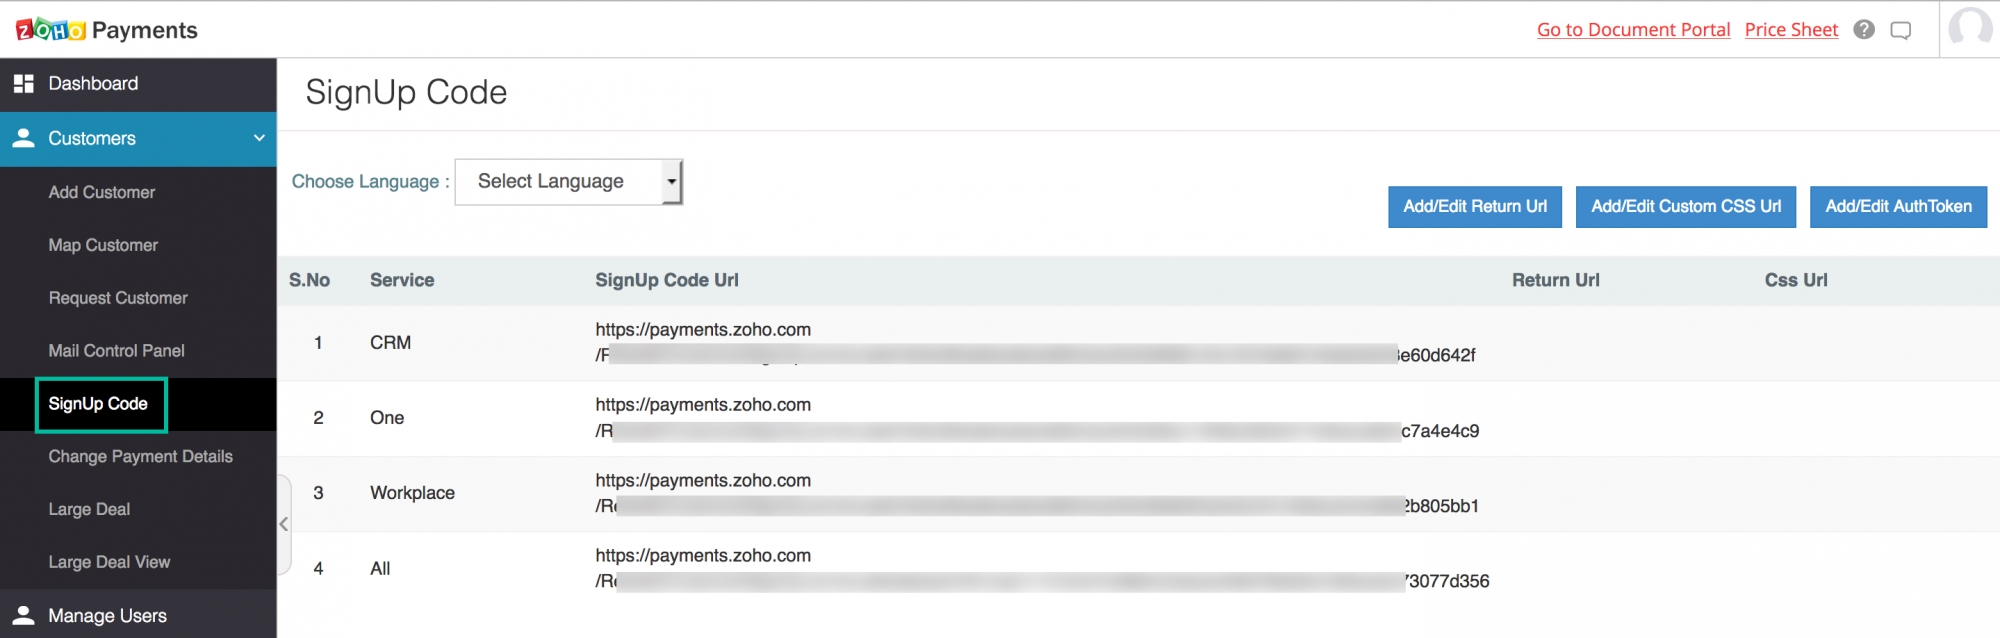
- The SignUp code URLs with their respective Services will be listed here.

You can copy the SignUp code URL for Zoho Workplace and share it with your potential clients. They can use this referral link to sign up as your client for Zoho Workplace.
Mapping existing Customers
You can map customers who already have a Zoho account to your Partner account.
- Login to Zoho Partner Store.
- Click on the Customers tab in the left menu.
- Select the Request Customer section under the Customer tab.
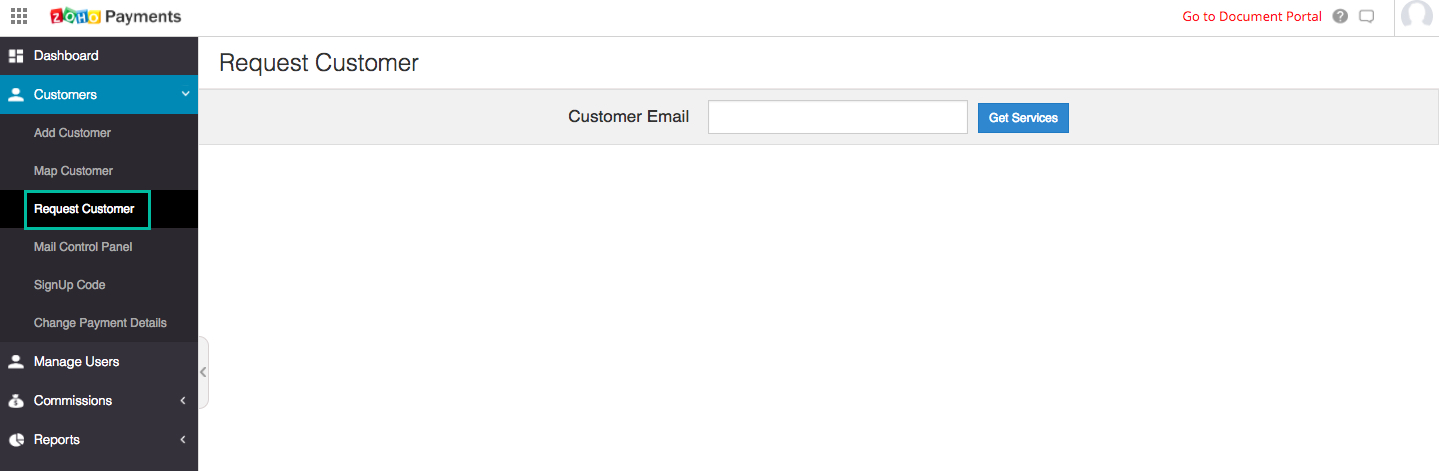
- Enter the email address of the customer and click on Get Services.

An email will be sent to the entered email address with an authorization URL. The customer can access the authorization URL to either accept or deny the request. The customer can also choose which of your services he would like to accept. Once the customer clicks on the Map option, he will be successfully mapped to your Partner account. If the customer decides to deny your services, the request will be canceled. In both cases, you will receive an email informing of your client's decision.
Same steps can be followed if you want to send a request for Partnership to a customer who is already mapped under another Partner. While the process remains the same, an intimation email will also be sent to the current Partner informing them of the changes.
Note:
If the customer needs you to manage his account, they need to select the Allow Zoho Workplace Control Panel Access checkbox while accepting your request for partnership.
Sign Up boxes
You can add customers to your Partner account by creating Sign Up boxes for your website. The SignUp code you obtain from the Customer tab can be embedded into your website as Sign up boxes. Customers can directly access these codes from your website to be mapped to your Partner account.
Generate your SignUp code
- Obtain the SignUp URLs for your respective services from the SignUp code section under the Customer tab. Click here for detailed steps.
- You can embed this URL in an iframe in your website or directly share it with potential customers.
Adding Return URL
You can configure Return URLs for specific SignUp codes. Once your customer finishes signing up using the SignUp code URL, they will be redirected to the Return URL.
- Login to Zoho Partner Store
- Click on the Customers tab in the left menu.
- Select the SignUp code section under the Customer tab.
- Click on the Add/ Edit return URL button in the top right corner.
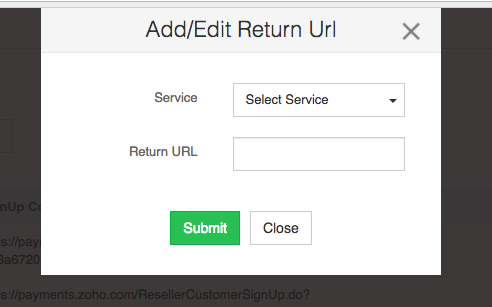
- Select the service and enter the desired Return URL.
- Click Submit.

Note:
The Return URL must include https along with the full URL.
Creating Sign Up boxes
- Login to Zoho Partner Store
- Click on the Customers tab in the left menu.
- Select the SignUp code section under the Customer tab.
- Click on the Add/ Edit Custom CSS URL button in the top right corner.
- Select the service and enter the CSS URL.
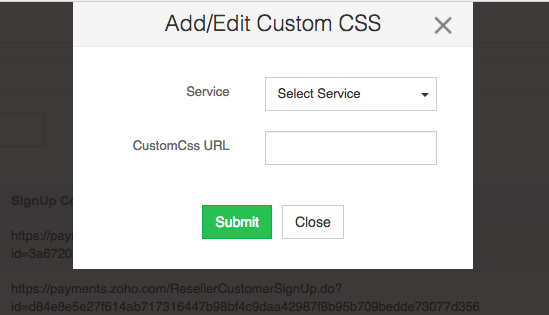
- Click Submit.
