Schedule and Send Emails
Send Later - Schedule Emails and Send Recurring emails
You can use Zoho Mail's Send Later option to set up schedules for your email and send it at a chosen time later. You can schedule an email to send it one time to your recipients or set up recurring emails to be sent at regular intervals. These emails will be in your outbox folder and will be sent at a fixed time.
Refer to the video below to know more about Scheduling emails:
Schedule Emails
The schedule emails are very handy when you want to send certain emails like your timesheets, or weekly reports worked upon during weekends or midnights, but want your manager in a different time zone to view at an optimal time, say Monday 11 AM. For businesses, it is always recommended to understand the best time to send an email and send your message accordingly.
It can also be the classic Birthday bug, where you remember the birthday the previous week but miss wishing them on the day. You can schedule the Birthday wish, with the date and time it should be sent.
Steps to Schedule Emails
You can follow the steps below to schedule and send an email.
- Log in to Zoho Mail
- Click New Mail to open the editor.
- Draft your email as usual.
- Add attachments, if any.
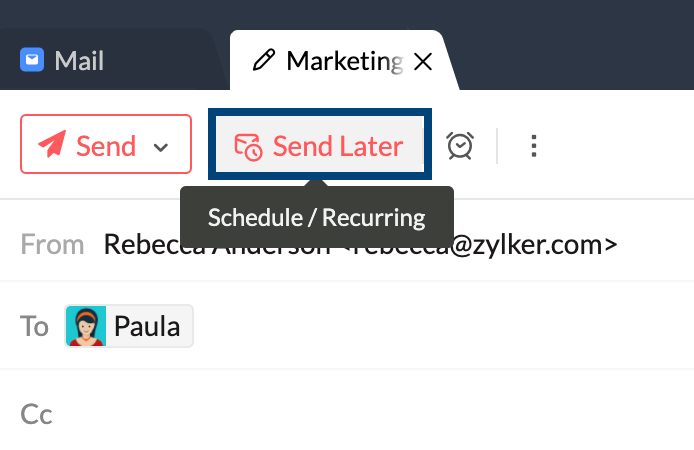
- Click Send Later.
- Select the Schedule tab to set up a schedule for the email.
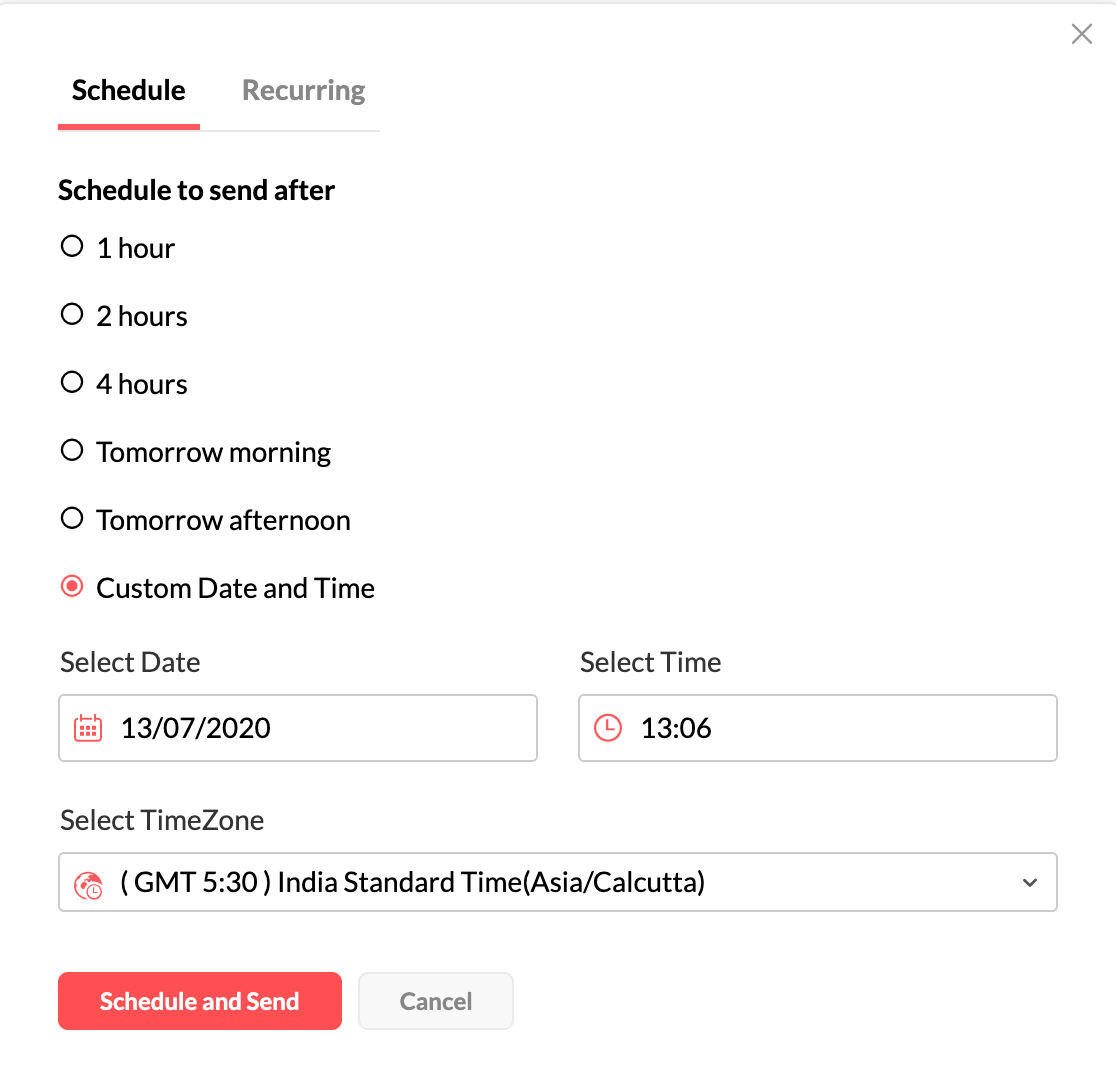
- The options available are 1 hour, 2 hours, 4 hours, Tomorrow morning, Tomorrow afternoon, and Custom date and time.
- You can directly pick a particular date, time, and timezone to set if you choose the Custom date and time option.
- Click Save.
- Once you click Send, the email will be moved to the Outbox and will be present there until the time you have scheduled.

Note:
The preset for Email scheduling can be configured using the Reminder preset settings.
Schedule Recurring Emails
You can also schedule Recurring Emails, where you can set the particular email to repeat, based on the frequency and the end date or the number of times required. Recurring emails are useful when you want to send out reminders to your clients about the bills, or to your co-workers about the weekly reports to be submitted.
When the recurring email is scheduled, the action will occur (email will be sent) based on the next recurring pattern that meets the criteria. eg, If you set the recurring pattern as Every Monday at 10:00 am on a Monday at 11 am the email will be sent on the recurring pattern from the next Monday.
- You can follow the steps below to schedule and send an email.
- Log in to your Zoho Mail account.
- Click New Mail to open the editor.
- Draft the email as usual.
- Add attachments, if any.
- Click the Send Later option.
- Select the Recurring tab to set up a recurring schedule for the email.
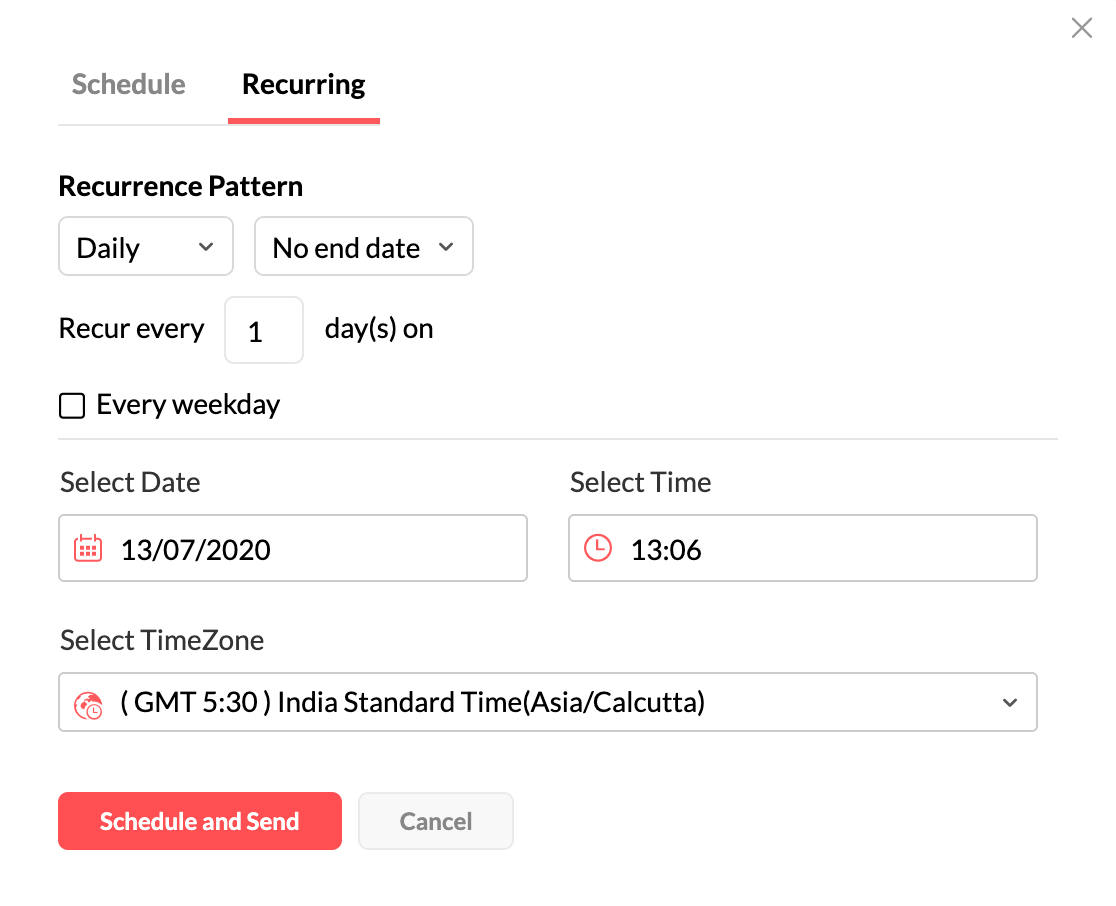
- The recurrence pattern can be,
- Daily - Every _ Days / Every weekday
- Weekly - Every _ weeks, on the selected day.
- Monthly - Every _ month on the selected day/ Specific day of the specific week
- Yearly - On the selected day of the chosen month/ nth day of the specific week
- Choose the preferred recurrence pattern from the given options.
- Pick the timezone you wish to schedule the email in.
- Click Save.
- The Scheduled email will remain in the Outbox and will be sent as per the recurrence pattern and frequency set for the email.

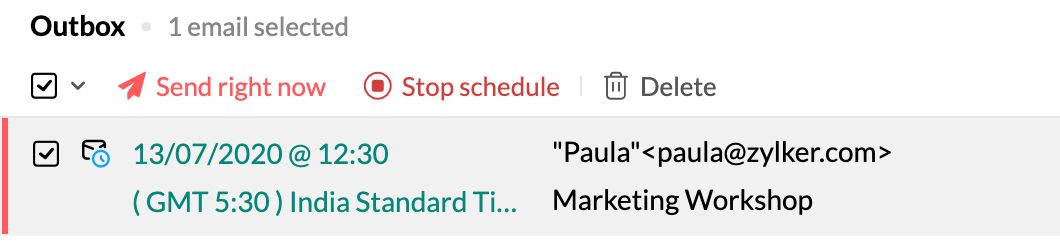
Scheduled Emails - Outbox
The scheduled and recurrence emails are listed in the Outbox, until the Scheduled date and time. You can edit the email from the Outbox folder to make any changes to the email. However, when you edit an email the existing schedule will be paused and the email will be moved to the Drafts folder. You can use the Send later option to schedule change the schedules of the emails to a convenient time.

When you schedule an email and set a recurrence pattern, the schedule will be overridden by the recurrence.
Similarly, when you have set a recurrence for an email, and then click on the Clock icon and set a schedule, the recurrence pattern will be removed.
Stop Schedule
You can stop the schedule for an email from the Outbox folder. Click on the schedule icon next to the relevant email in the Outbox listing. Stop Schedule button will be displayed. Once you click on the button, the schedule will be stopped and the email will be saved as a draft. You can also decide to send the email immediately by selecting the Send right now option next to the Stop Schedule button.