Zoho Mail Plugin for WordPress
Zoho Mail Plugin for WordPress helps you configure your Zoho Mail Account in your WordPress site. It allows you to send emails from WordPress using your Zoho Mail account.
Table of Contents
To make sure that emails from your website are considered valid and authentic, you need to use only authorized server configuration to send emails. Configuring email servers for your websites can be too technical and complex. To make it simple, in WordPress Sites, you can directly install the Zoho Mail Word Press Plugin to easily use your accounts in Zoho Mail to send emails.
Zoho Mail Plugin for WordPress - Requirements
To use the Zoho Mail Plugin for Wordpress, you need to have a self-hosted Wordpress site for your domain.
- A Zoho Mail Account
- A self-hosted WordPress site
- PHP 5.6 or later
How to install Zoho Mail Plugin in WordPress?
- Login to your self-hosted WordPress account and navigate to the Admin Dashboard.
- Go to Plugins > Add New section of the Dashboard from the left menu.
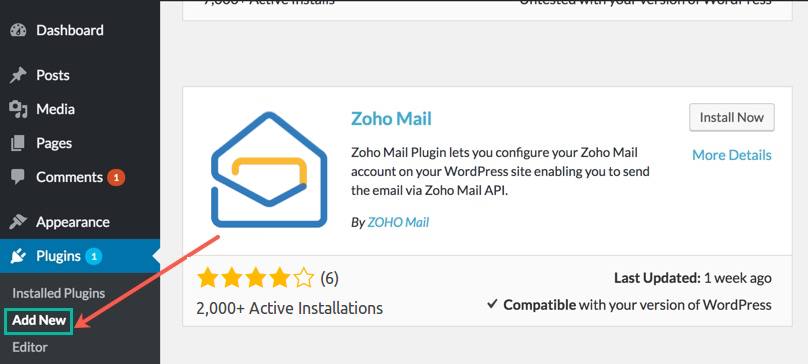
- Search for Zoho Mail Plugin using the Search bar and click the Install Now button next to the plugin.
- You can also install the Zoho Mail Plugin from here.
- To activate the plugin, go to the Plugins > Installed Plugins Section.
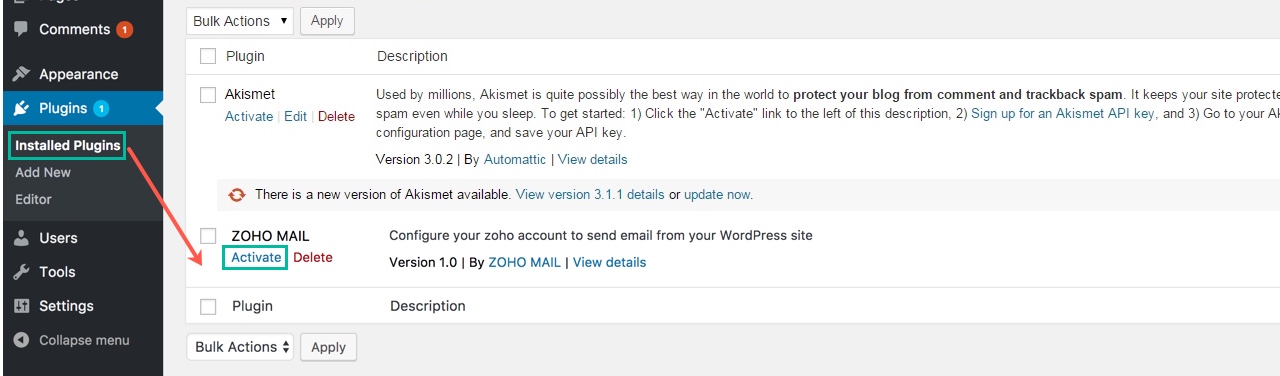
- Click the Activate button corresponding to Zoho Mail Plugin.
- The Zoho Mail plugin has now been activated in your WordPress account.


Parameters - Zoho Mail WordPress Plugin
| Parameter | Description |
| Client Domain | The region in which your Zoho Account Data resides. (One of the valid domains hosted with Zoho) |
| Client ID | The Client ID assigned to you when you register your application in the Developer Console. (Generated in Zoho Developer Console) |
| Client Secret | The Client Secret of the registered application. (Generated in Zoho Developer Console) |
| Authorized Redirect URI | The callback URI obtained from your Site to create the Client ID. (Available from Wordpress Configuration Page) |
| From Email Address | The email address that will be used while sending all emails. (From Email address/ Email Alias of your Zoho Mail Account) |
| From Name | The name that will be shown as the Display Name while sending all emails from WordPress. |
Configuring Zoho Mail Plugin
Once the plugin is installed, you need to configure your Zoho Mail account in WordPress to send emails via Zoho Mail API.
- After installing the plugin, Zoho Mail plugin tab will appear on the left menu. Navigate to the Zoho Mail Account configuration page under this tab.
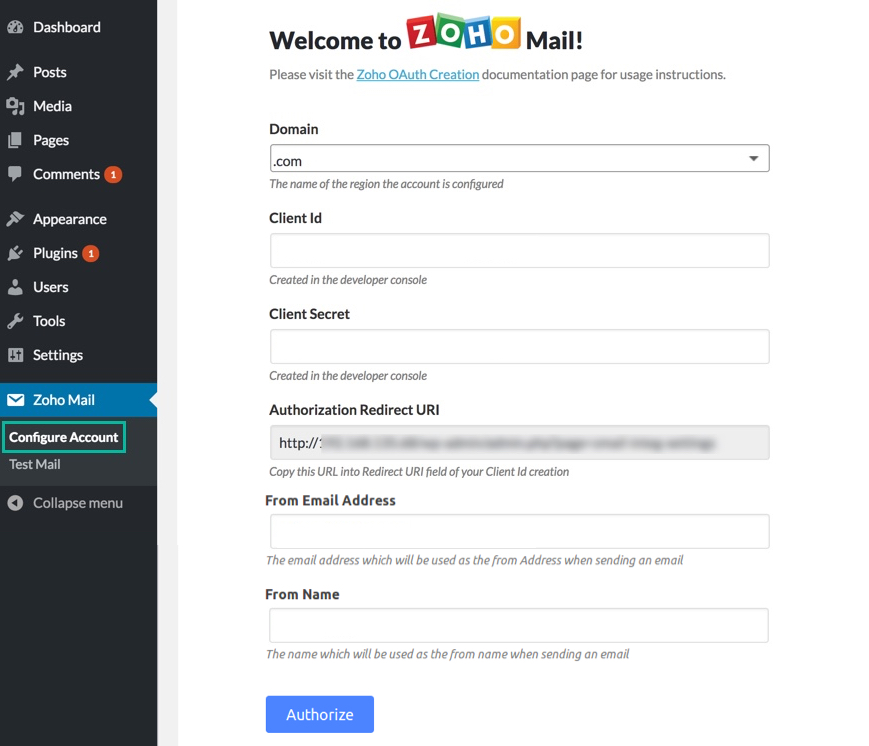
- Copy the Authorized Redirect URI provided on that page.
- Login to your Zoho Mail Account and access the Zoho Developer Console to create a new Client ID and Client Secret to access Zoho Mail API.
- Click on Get Started if you have no existing Client. If you have an existing client, click on Add Client on the top-right corner.
- Select Server-based Applications in the Client Type window.
- Provide the appropriate Client Name and your domain in Homepage URL along with the Authorized Redirect URL copied from your WordPress account.
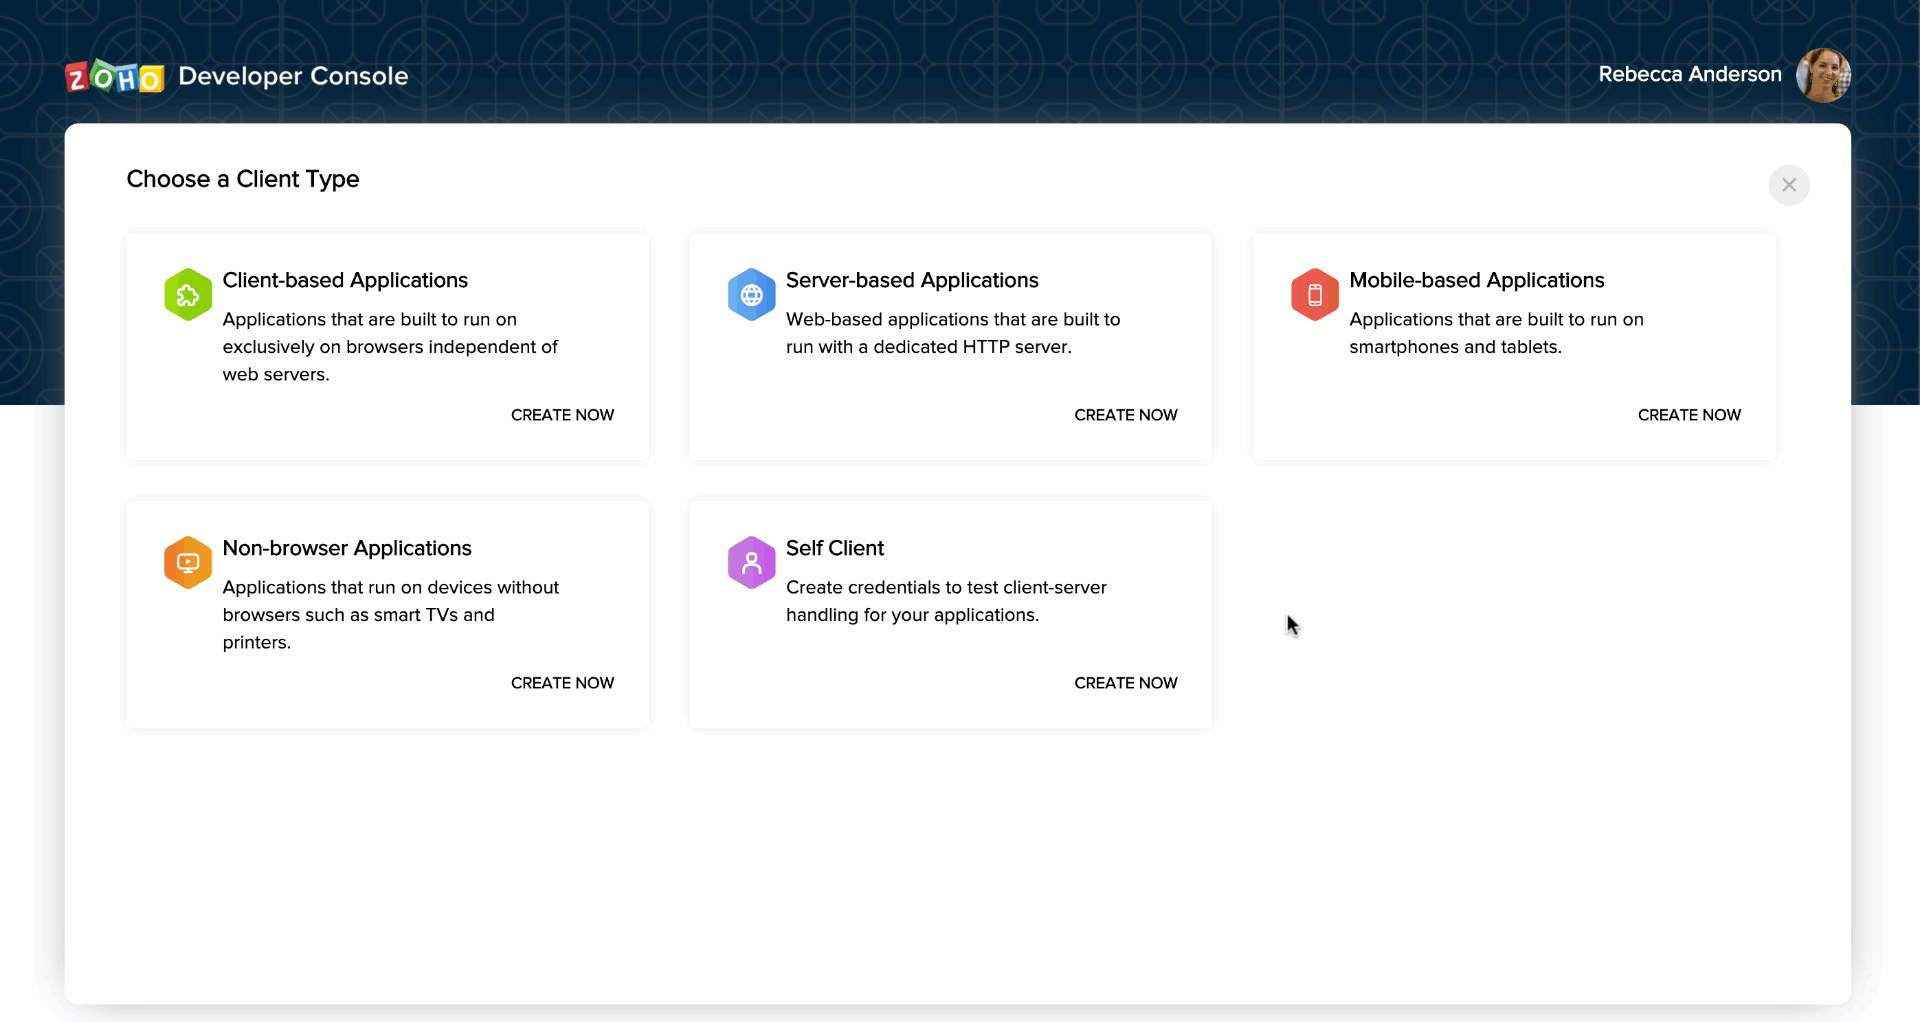
- Click Create to receive the Client ID and Client Secret.
- Go to the Zoho Mail Account configuration page in the WordPress Dashboard to complete the process.
- Enter the obtained Client ID, Client Secret and the From Email Address and Name in this page.
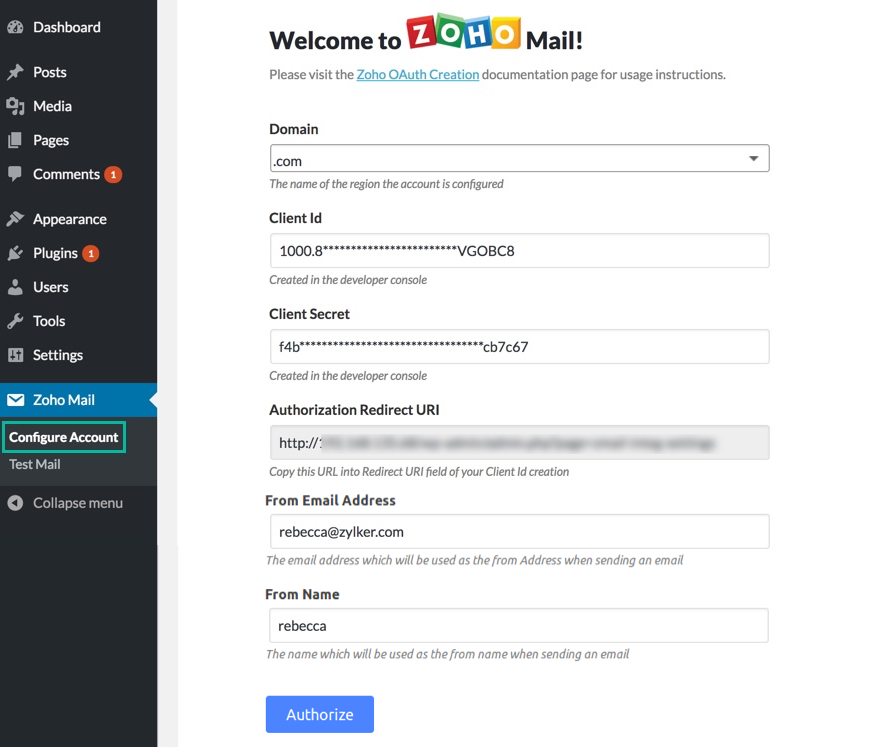
The 'FromEmailId' should be the from email address (default email address/ email alias) of the same account, for which the Client Secret was generated. - Click Authorize.
- A consent screen asking permission to access your Zoho Account data is displayed. Click Accept.


You will now be able to send emails from your WordPress site using your Zoho Mail Account.
Test Plugin
Once the Zoho Mail plugin is configured in your WordPress account, you can check the functionality of the plugin by sending a Test Email.
- In your WordPress Dashboard left menu, go to Zoho Mail > Test Mail.
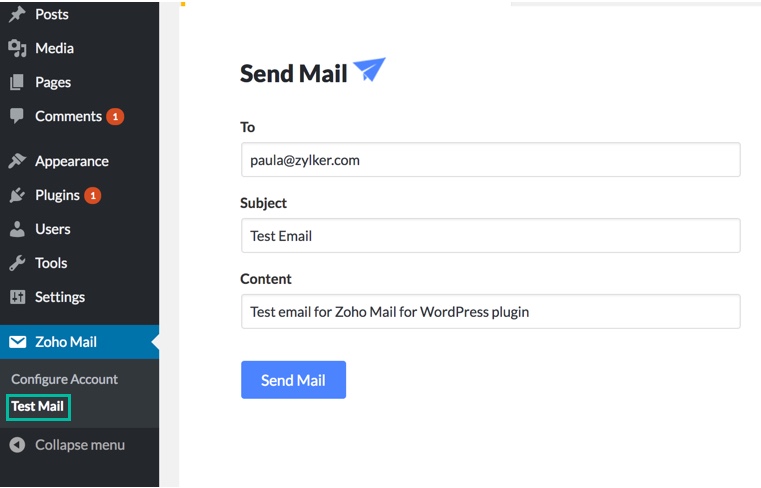
- Enter the following details:
- To: Email Address of the recipient
- Subject: Subject of the email
- Content: The message or body of the email
- Click Send Mail.

A test mail will be sent which will be available in the Sent folder of the Zoho Mail Account used to configure the plugin. By default, the email will be sent using the 'From address' of the account
Note:
- You can set a ReplyTo address for the emails sent through the plugin, provided that the To address is the same as the From address you configure.
- HTML emails are supported by Zoho Mail Plugin. HTML emails can be sent if the content type is set accordingly in the header, by the plugin that initiates the email. Click here for details.
- Sending emails through Zoho Mail is subjective to our Usage Policy restrictions. Please refer to our Usage Policy page for details.
Troubleshooting
Invalid Client Secret
- While configuring your plugin, ensure you have entered the correct information in the Domain field. Select the region in which your Zoho account is hosted (in, com etc).
- Verify if the Client ID and Client Secret used in the configuration page matches with the Client created for the plugin in Zoho Developer Console.
Mail not sent in HTML format
In order for the mail to be sent in the HTML format, content type must be set as text or HTML before sending the email. Refer here to find out more.
Mod security error
On successful authentication, Zoho Mail tries to redirect to your configuration page. This process could be restricted by your service provider. Ensure that your admin has removed the mod security rule for the redirect URL given in the plugin configuration page.
If all the above-given troubleshooting methods do not resolve the issue, reach out to our Customer support (support@zohomail.com) with the screenshot of the configuration settings page for a solution.