Client Profiles
The client profile is the space where you can find an overview of all the details relating to a particular client. You can view their address information, contacts, assigned users and activity history. You can also create tasks or client requests, send emails and navigate to their insights or organization. It serves as a centralized hub for managing and accessing essential client-related data within Zoho Practice.
Let’s take a quick tour of the client profile and how you’ll be able to manage your client details from this space.
Manage Client Information
You can view the primary information of your clients such as their business name or address details from the left pane.
Adding Contact Persons
A contact person is a designated individual who serves as a point of communication related to tasks or general clarifications with respect to your client. For example, If you need to discuss specific legal details or seek clarifications, you can add the relevant legal consultant of your client as a contact person. This way, you can choose to communicate directly with the designated attorneys of your client.
You can add up to 100 contact persons for a client. To add a contact persons:
- Navigate to the respective client’s details page.
- Click the Contact Person button under Contact Persons.
- Enter the required details of the contact person.
- Click Save.
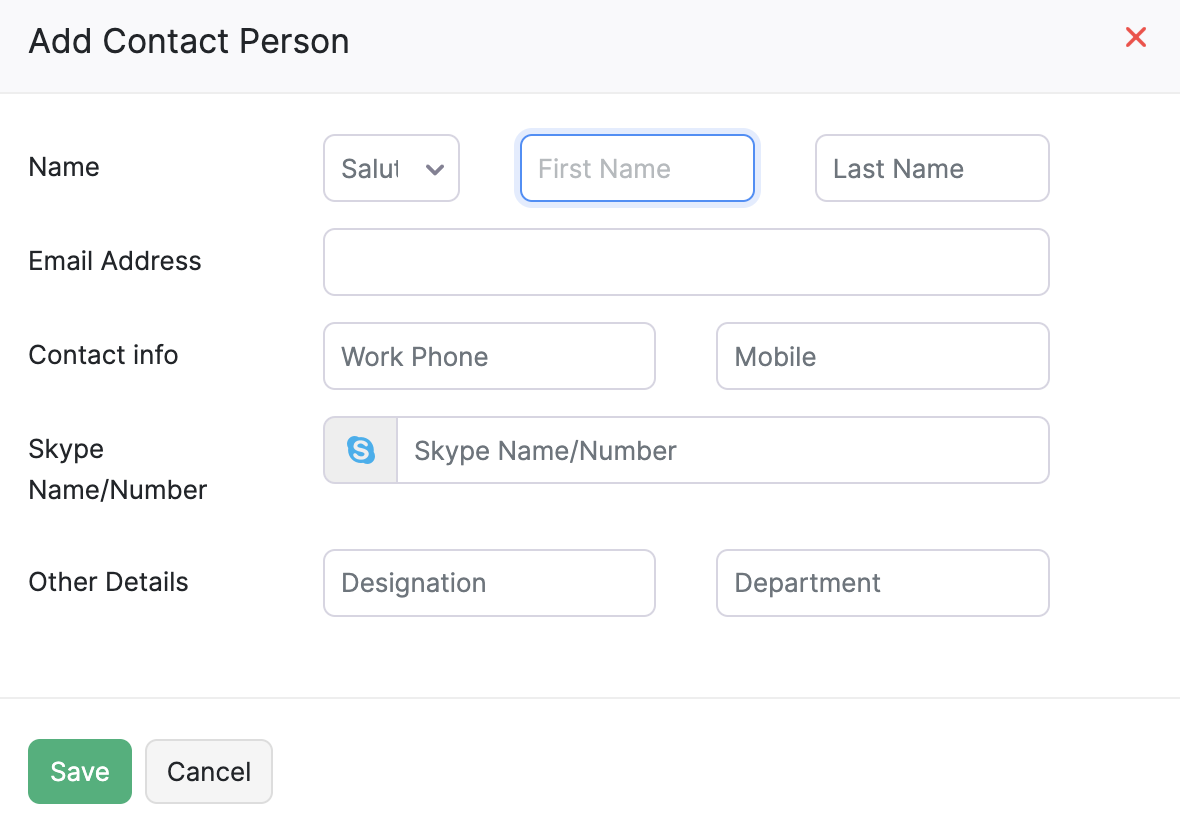
Note:For clients with linked organizations, you can add users from the respective organization as the client’s contact persons.
Assigning Users
You can assign users to your clients to manage their accounting needs. The assigned users will be able to access the client’s information, collaborate with them through client requests, and view their insights. The users can also access the client’s organization created in the associated Zoho Finance applications as Accountants.
To assign a user to a client:
- Go to Clients on the left sidebar.
- Select the client for whom you want to assign a user.
- In the next page, navigate to the Profile tab.
- In the Managed By section, click + Assign User.
- In the pop-up that appears, select the Users you want to associate.
- Check Add selected users to the client’s organization to allow your users to access your client’s organization and collaborate with them.
- Under Application, select the applications and role you want to assign to the user.
- Click Assign.
The selected users will be added to the client’s organization in the respective Zoho Finance applications.
If you don’t want the user to access your client’s organization, you can remove the user from the respective Zoho Finance application. Here’s how:
- Go to Clients on the left sidebar.
- Select the client for whom you want to unassign a user.
- In the next page, navigate to the Profile tab.
- In the Managed By section, click the More icon next to the respective user, and select Remove from the dropdown.
- In the Unassign User pop-up, select the Application from which you want to remove the user.
- Click Unassign.
The user will be removed from the client’s organization in the selected Zoho Finance application.
What’s Next
This section contains the list of actions you need to perform next while adding a client to Zoho Practice. This ensures that you’ve completed all the steps for adding a client to your Zoho Practice organization.

Accessing Client’s Organizations
You can access your client’s Zoho Finance organizations with just a single click from within Zoho Practice. Click the required Go to Organization in the top pane of the client’s profile page.
Linking and Unlinking Client Organizations
Linking Other Clients Organizations
To import a client’s organization:
- Go to the Clients module from the navigation bar on the left.
- Navigate to the respective client’s profile page.
- Click Import Client Organization in the left side pane.
- Select the respective organization.
- Click Import Organization.
Unlinking Zoho Clients Organizations
Note: This is only applicable for the clients with the Client Type as Zoho Client.
Here’s how you can unlink an organization of a client from their client profile in Zoho Practice:
- Go to the Clients module from the navigation bar on the left.
- Navigate to the respective client’s profile page.
- Click the more icon in the top pane.
- Click Unlink Organization.
Note: When you unlink an organization, the Zoho Practice users who were added to your client’s organization will be removed as well.
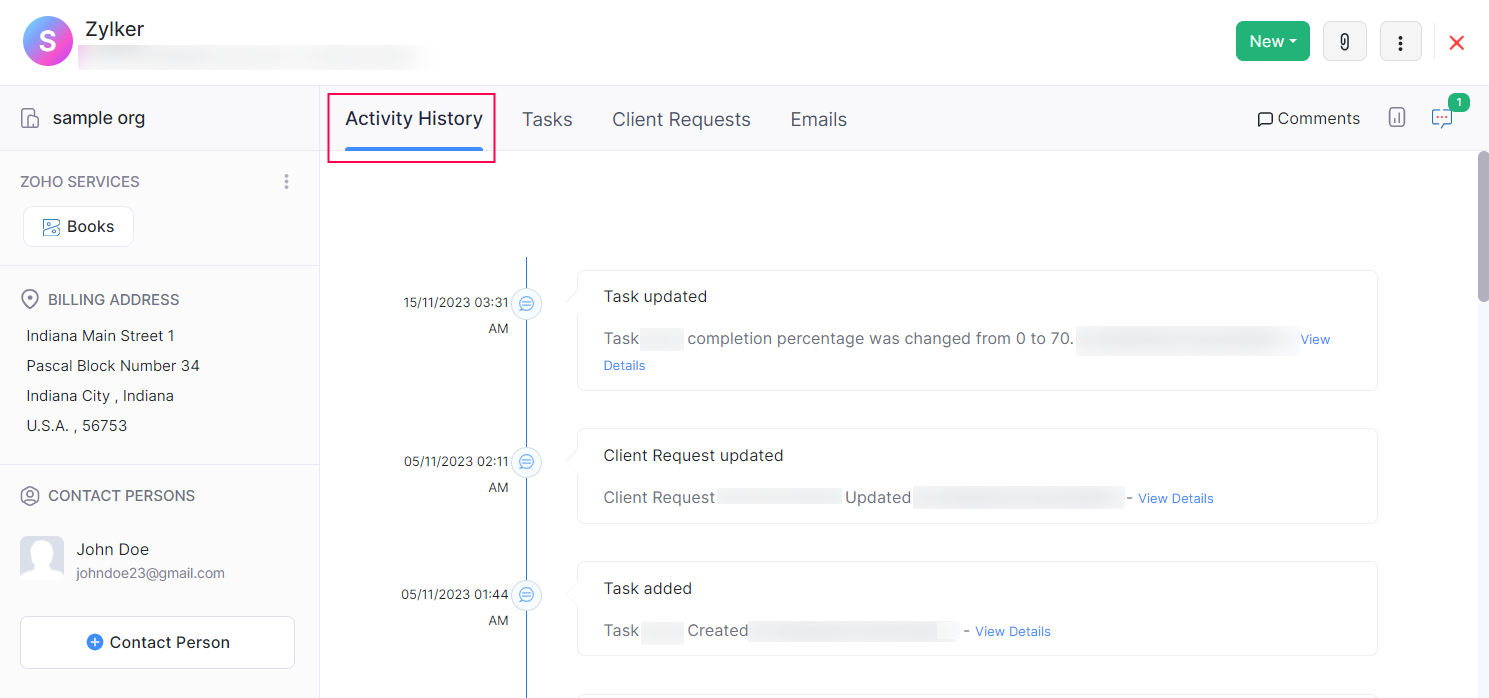
Activity History
Activity History provides a record of every activity related to your client in Zoho Practice. This includes the details of the activity, the associated user, and the time stamp of when the activity occured. The section serves as a valuable record-keeping section, and can provide insights into the sequence of events relating to the particular client. This is especially helpful during audits.
Emails
Prerequisite: Your Zoho Practice organization must be integrated with Zoho Mail. Learn more about integrating Zoho Practice with Zoho Mail.
In this section, you can view the manually sent email notifications and system-generated emails that are sent to your client from Zoho Practice. Once your Zoho Mail account is linked, you can:
- Click on any of the emails and view it’s details.
- Create tasks from a specific email.
- Download attachments in the emails and add it to the client’s documents in Zoho Practice.
Learn more about the Zoho Mail integration.
Tasks
You can create tasks right from the client’s profile. Here’s how:
- Navigate to the respective client’s profile page for whom you want to create tasks.
- Click the Tasks tab on the top pane of a client’s profile page.
- Click the New Task button on the top-right corner.
- Enter the required details of the task.
- Click Save.
Client Requests
You can create client requests for your clients right from the client’s profile page. Learn more about client requests.
Note: You will be able to create client requests only for clients whose client type is Zoho Client.
- Navigate to the respective client’s profile page.
- Click the Client Requests tab on the top pane of a client’s profile page.
- Click the New dropdown in the top-right corner and select Client Request.
- Enter the required details of the client request.
- Click Save.
Adding Comments
Each of your clients may have their own way of managing their organization or how they prefer their tasks to be done. One cannot always remember every nitty-gritty detail about a client. This is why it’s crucial that any client-specific information is recorded for the benefit of your team to have all your team members on the same page.
You can add comments to a client’s profile to record any key information or insights about your client. Here’s how:
- Navigate to the respective client’s profile page.
- Click Comments in the top pane of the client profile.
- Enter the information you want to record in the Comments modal.
- Click the Add Comment button.
- You can also delete the comment by clicking the delete icon next to your comment.
Note: These comments can be viewed by the users assigned to the client and by users with the necessary permissions.
Viewing Insights
You can navigate to a client’s insights directly from the client’s profile page. Click the insights icon in the top pane and you will be redirected to the client organization’s insights.
In certain instances, when the client’s organization has insight alerts, you will be able to view them directly from the client profile. Once you click the insights icon, the Alerts popup will be displayed. The Alerts popup has insights related to unusual increase or decrease in the general ledger of your client’s organization. You can click View Insights in the top-right corner of the popup to go to the insights page.

Contextual Chat
You can use contextual chats to initiate discussions with the users in your client’s organization. Alternatively, you can create a group with only Zoho Practice users as participants to have discussions internally regarding the client.
Here’s how you can create a contextual chat:
- Navigate to the respective client’s profile page for whom you want to create client requests.
- Click the Contextual Chat icon in the top pane of the client profile.
- Click New Chat.
- Enter a title and select the client organization users that you’d like to add to add to the chat.
- Click Create.
Adding documents or files
You can add documents related to a client from their profile page. To do this:
- Navigate to the respective client’s profile page for whom you want to create client requests.
- Click the attachments icon in the top-right corner.
- Click Upload Files.
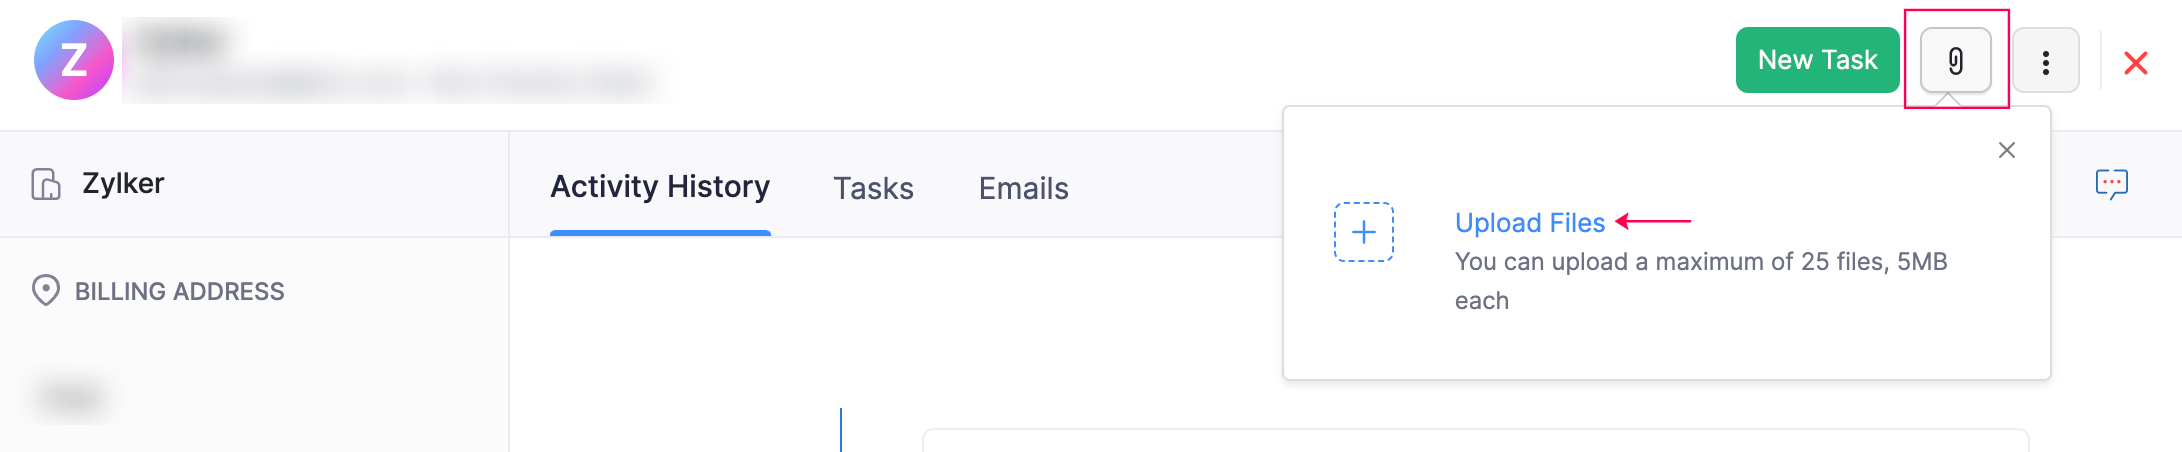
Note: You can upload a maximum of 25 files with each file size being 5MB or lesser.
- Select the files you want to upload and click select. The files you’ve selected will now be uploaded to Zoho Practice. You can view these files by clicking the attachments icon or from the Documents module in the left navigation bar.
Note: If your organization is integrated with Zoho Mail, you can add documents directly from emails.
When you hover over the file, you will find the options to download, remove and delete the file.
- Download - The file will be downloaded to your local device.
- Remove - The file will be removed from the client’s profile page. However, you will still be able to access it from the Documents module.
- Delete -The file will be deleted from Zoho Practice and you will not be able to access it again.